If your night photos look sharp on your camera screen but soft on your computer, the tripod is often the culprit. I’ve had this happen after a long street session where everything “felt” steady. Then I reviewed the files and saw tiny blur in the shadows—classic vibration or a head that flexed under load.
A tripod for night photography isn’t just “something that holds your camera.” It’s a stability system. This Tripod Buying Guide for Sharp Night Photos walks you through what actually matters: stance, head type, center column choices, and how to control vibration so your long exposures stay crisp.
Tripod Buying Guide for Sharp Night Photos: the quick stability checklist
Sharp night photos come from stiffness first, height second. Before you compare brands, check these basics because they decide if your tripod will stay still during 5-second, 30-second, or 2-minute exposures.
- Max load: pick a tripod rated for at least 2× your real camera+lens weight.
- Leg angle: wider stance beats tall skinny legs. Spread the legs wider for ground stability.
- No center-column use: for the sharpest stars and city lines, keep the center column down.
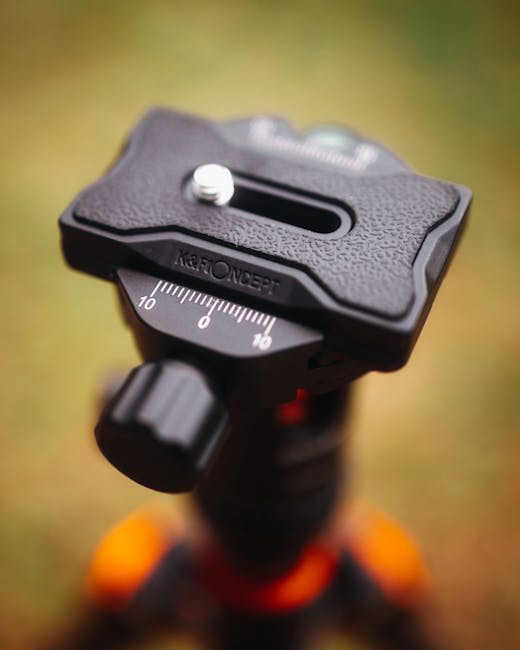
- Head stiffness: a cheap ball head can move when you touch a focus ring or zoom ring.
- Weight is not everything: lighter tripods can work, but only if the joints are tight and the legs don’t wobble.
What most people get wrong is buying for “max height.” In night work, you’ll often be near ground level anyway, especially if you want less vibration and more control.
Why night tripod stability matters (and how vibration shows up)
Night tripod vibration is usually tiny, but the camera records it. Long exposures make small movements visible, especially at higher magnification or when you crop in hard.
Here’s how it shows up in real life. You set up near a sidewalk, lock focus, start an exposure, and a passing truck rumbles the ground. Or your kid bumps the tripod leg while you’re framing. Or you press the shutter and the camera jolts just a bit. On a 1-second exposure, you might not see much. On a 30-second exposure, it’s more likely to smear.
Vibration comes from three common places:
- Legs: loose locks, thin tubes, or uneven ground.
- Head: flex in the pan/tilt mechanism or a ball joint that shifts under load.
- Camera contact: touching the lens, changing focus, or hitting the tripod when you reach for the phone.
In 2026, most camera makers expect long exposures and in-body stabilization, but that doesn’t fix tripod shake. Stabilization helps when your body moves slightly. It doesn’t stop a loose head from flexing.
Legs and stance: what to look for before you even choose a head
Start with the legs because they control your foundation. A tripod with great head features won’t save you if the legs twist or the locks loosen.
Center column: use it for convenience, not sharpness
The center column is the most common reason night photos lose crispness. It’s great when you need height fast. For sharp stars, long city exposures, and flat ground shots, keep the center column down and use the legs instead.
If you must raise the center column, keep the camera as low as you can. Also avoid extending it fully unless you’re shooting wide and you’re sure wind is calm.
Leg locks, diameter, and joint tightness
Leg locks matter more than people think. I always check how the tripod feels when I open and close the locks. If it feels slightly “gritty” or uneven, that grit can mean tiny movement under stress.
For practical buying: look for metal locks with a positive click and strong tension. Many modern tripods are good, but the difference shows up when you load the tripod with your heaviest lens and lightly push it from different angles.
Feet and uneven ground: spikes vs rubber
Feet can ruin or save your night setup. Rubber feet are fine indoors or on smooth pavement. Spiked feet are better on soft ground and reduce slipping when you tighten everything.
If you shoot on docks, grass, or muddy ground, spikes are worth it. If you shoot inside venues, spikes can be a problem, and you’ll often want flip-out rubber covers.
Wind and ground bounce: the “stability test” you can do in 60 seconds
Do this test in the store or before you trust the tripod at night. Extend the legs to your usual setup height, mount your camera, and then:
- Set your camera level, then lock the head.
- Gently push the camera and the tripod in two directions (front-back and left-right).
- Watch how long it keeps moving.
You’re looking for quick settling. If it keeps wobbling for more than a second, your long exposures may show blur unless you use short timing tricks.
Tripod head types for night photography: ball, pan-tilt, and geared
Head choice decides how easily you frame and how much the tripod moves when you adjust. For night photos, you usually care about two things: locking stiffness and precise aiming.
Here’s the simple breakdown:
| Head type | Best for | What you’ll feel | Night photo trade-offs |
|---|---|---|---|
| Ball head | Fast setup, handheld-like speed on the tripod | Quick framing, one knob locks most motion | Some models “creep” when you tighten or when you touch the lens |
| Pan-tilt head (fluid or dry) | Cityscapes, waterfalls, smooth pan control | Two axes with separate locks | Cheaper locks can be less stiff than you expect |
| 3-way pan-tilt head | Stars, architecture, precise framing | Slow but accurate adjustments | Slower to move, but excellent for stable aiming |
| Geared head | Long sessions, astrophotography, micro-aim adjustments | Fine turns with repeatable increments | More expensive and bulkier; not necessary for most night city work |
Ball head: what to check for sharp night results
Ball heads can be great at night if they lock like a vise. When you tighten the main knob, do you feel any slip? If the camera shifts a millimeter, it can be enough to ruin star point placement or make horizons look slightly off.
Also check whether there’s a separate panning lock and whether the friction settings hold steady. A lot of people set friction too loose to “make it easier,” then wonder why the framing changes during the exposure.
3-way head: my go-to for long exposures when I want control
I use a 3-way head more often than I expected because it removes guesswork. You can move slowly in small steps, and locks stay predictable when you press the camera settings.
For night city shots, a 3-way head helps you align verticals and keep buildings straight. For astrophotography, it’s even better for small angle changes without touching the lens.
Geared head: when you should spend more
A geared head is not automatically better. It’s better when you need repeatable micro-movements. If you’re doing serious star tracking, mosaics, or you’re chasing the exact composition with minimal touching, geared heads pay off.
If your main goal is sharp skyline photos at 10–30 seconds, you don’t need the biggest geared setup. In that case, stiffness and vibration control will matter more than fancy knobs.
Vibration control steps that actually work (from setup to shutter)

Vibration control is a chain. If one link is weak, you’ll see blur even with an expensive tripod.
Mounting: get the center column and camera position right
Mount your camera carefully. Tighten the plate firmly, but don’t twist the camera like you’re opening a jar. Twisting can preload strain in the head and create later settling movement.
Keep the camera low when you can, and avoid extending the center column. For long exposures, “lower and wider” beats “taller and narrower” almost every time.
Reduce touch: use a remote or timer every time
Touching the camera is one of the fastest ways to ruin sharpness. Use a wired remote, a built-in timer, or an interval app. Set it so the camera starts after you step back.
My rule: if I’m on a tripod for night work, I’m never firing by hand. I use a remote even for 10-second shots because the extra habit is worth it.
Use “mirror up” or electronic shutter wisely
On many cameras, you can reduce shutter shock using electronic shutter or a mirror-up setting. Electronic shutter is great when banding isn’t an issue (some lights can cause stripes). Mirror-up works well for mechanical shutter setups.
If you’re shooting city lights with flicker, test a few frames at the same settings. The “right” choice can depend on the light source and the shutter mode your camera supports.
Stabilize the tripod from the top, not by grabbing the lens
When you need to adjust framing, don’t grab the lens barrel. Grabbing the lens can flex the tripod/head slightly. Instead, adjust using the tripod head controls, then stop touching it and let it settle.
If you just moved the head, wait 1–3 seconds before starting the exposure. That short pause fixes a lot of “why is it slightly soft?” mysteries.
Add weight for windy nights (but do it safely)
Many tripods have a hook under the center column for adding a bag. Hang weight carefully so it doesn’t swing. A swinging bag is worse than no bag.
I’ll add a small backpack only when it’s calm enough that the bag doesn’t bounce. If it’s windy, I’ll skip it and focus on wider stance and lower height.
How to choose tripod height and load for your camera gear
Choosing the right height and load prevents two problems: instability and awkward positioning. Both lead to mistakes during night shoots.
Pick load based on real weight, not “max capacity” marketing
Tripods usually list a “max load,” but that’s not the same as “sharp at long exposure.” For night work, aim for a tripod that can handle at least double your camera+lens weight.
Example: if your camera body is 800 g and your lens is 900 g, that’s 1,700 g (1.7 kg) before accessories. Add a lens hood, maybe a filter, and a battery/grip weight. A tripod rated for 3.5 kg or more is a better match for stability.
Height math: shoot low and protect framing
Night photography often rewards lower angles. Streetlights, reflections, and architecture look better when the camera is closer to the ground. If you buy a tripod that’s too tall for you, you’ll raise the center column or hunch over and move the setup accidentally.
Set your tripod at a comfortable working height. Then use the lens length and your composition skills to get the framing you want without maxing out the center column.
Don’t forget accessories that change stability
Tripods also need room for real accessories. Add-ons that matter at night include:
- Long lenses (more leverage on the head)
- Large ball heads or plates that add weight above the center
- External monitors (extra shake risk if you touch them)
- Heavy flashes or lights (usually not on a tripod, but if you do, plan stability)
If you’re shopping in 2026, think like a system builder: legs + head + camera + plate + accessories all add up.
People Also Ask: Tripod Buying Guide for Sharp Night Photos
What tripod is best for astrophotography at night?
The best tripod for astrophotography at night is the one that stays stiff and lets you control aiming precisely. For star points, stiffness wins over “cool features.” A sturdy 3-way head or geared head helps because you can make small, controlled adjustments without bumping the camera.
If you’re doing tracked astrophotography, the tripod must also handle the extra tension from the mount system. In that case, focus on strong legs, tight locks, and a stable setup on the ground. If you’re doing simple wide-field star trails without tracking, stability and minimizing center column use still matter the most.
Do I need a fluid head for night photography?
You don’t need a fluid head for most night photography. Fluid heads are meant for smooth video panning, where the movement is controlled on purpose.
For night landscapes and cityscapes, a fluid head can be fine, but you must be sure it locks solidly. If it keeps drifting when you tighten it, that drift becomes your enemy during long exposures.
Is carbon fiber better for night tripods?
Carbon fiber can be better, mostly because it often stays stiff for its weight. But “carbon” isn’t a magic sharpness switch.
Some aluminum tripods outperform weaker carbon models. What matters is how tight the joints are, how the legs lock, and how your head holds still under load. If you’ve got the budget, carbon is a nice upgrade for travel-heavy night sessions.
Should I use a tripod for 10-second night shots?
Yes, if you want consistent sharpness and you’re near the limits of your lens or your shutter speed. Even 10 seconds can show blur from tiny movements.
Here’s a simple way to decide: if you’re shooting wide with a strong light source and your shutter speed is 10 seconds or less, a tripod helps a lot. If you’re shooting with a long lens, even shorter speeds can show tripod shake, so a stable support becomes more important.
Tripod head vs camera stabilization: what’s the real relationship?
Image stabilization is not a tripod replacement. Stabilization (in-body or in-lens) helps when you’re handholding and your movement is random and short.
On a tripod, you should usually turn stabilization off unless your setup is specifically designed for it. When stabilization is on, the system tries to correct movement that isn’t happening in the same way on a tripod. That can sometimes lead to a tiny hunt effect—tiny changes during the exposure.
If you want a simple rule: when the camera is locked down on a tripod, turn stabilization off and rely on the tripod + remote shutter timing.
Comparison: what to buy first if you only budget for one upgrade
If you have a limited budget, don’t spend first on “fancy head features” or “max height.” Spend on stiffness and vibration control.
Use this order:
- Upgrade tripod stability: sturdier legs, tighter locks, and wider stance options.
- Pick the right head type: 3-way for precision or a locking ball head with strong stiffness.
- Then add vibration tools: remote shutter, timed exposures, center column discipline.
- Finally, adjust workflow: settle time, correct shutter mode, and careful handling.
If you’re cross-shopping, consider how the head will behave when you touch the camera. The first adjustment you make at night usually happens right before you start the exposure. That’s when weak stiffness shows up.
Real-world scenarios: how this guide plays out on location
Night gear is easy to test indoors. Real sharpness happens outdoors, with wind, crowds, and uneven ground.
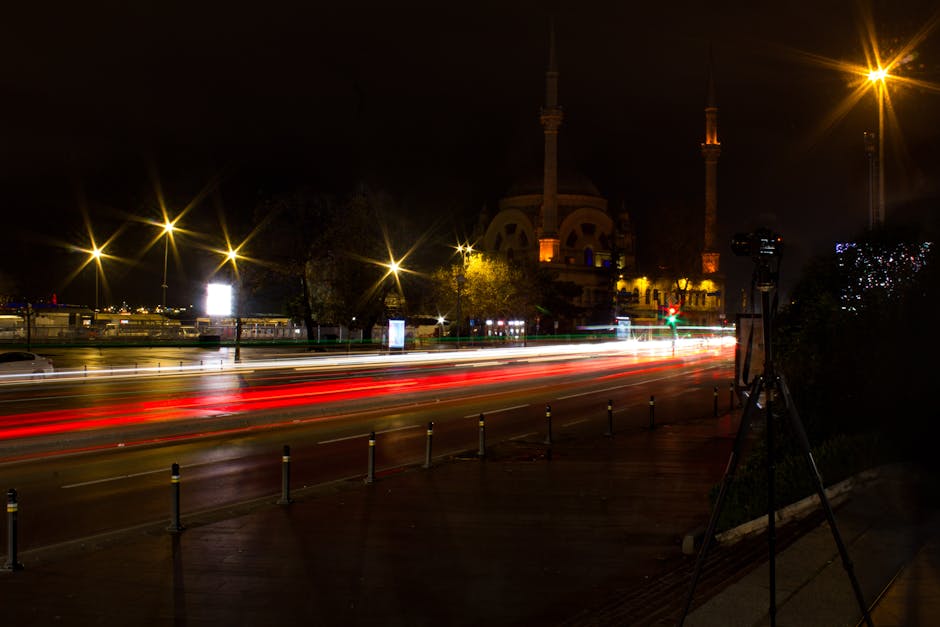
Scenario 1: city skyline with long exposures (10–30 seconds)
I’ve shot skyline shots on busy nights where people walk close enough to bump a tripod. The tripod that wins here is the one with a wide stance and a head that locks without creep.
I set the legs wide, keep the center column down, and use a remote shutter. I check framing twice, stop touching it, and then start the exposure after a brief settle pause.
Scenario 2: waterfall or river with moving water (1–2 minutes)
Water doesn’t just move in the frame—it can also create mist and damp conditions. Those conditions can make locks feel looser over time if the tripod isn’t built well. I wipe down and re-tighten locks before long sessions.
For this kind of work, a 3-way head or a stiff pan-tilt head is often easier. You can lock and fine-tune without wobble, and you can keep the composition for multiple exposures.
Scenario 3: moonless street photography with light rain
Rain makes everything slippery. Even with a stable tripod, your gloves or wet hands can nudge a head adjustment.
I use a remote, keep lens touches minimal, and aim for lower tripod height. If wind picks up, I skip added weights that could swing. I’d rather lower the center of gravity than gamble with hanging bags.
Conclusion: your next tripod purchase should be about stiffness, not just features
A Tripod Buying Guide for Sharp Night Photos comes down to one thing: control vibration from the ground up. Get stable legs with tight locks, use the center column less for the sharpest work, choose a head that locks without creep, and shoot with a remote so your hands don’t add blur.
If you do only one actionable step tonight, do this: set up your tripod, frame, lock the head, wait 2 seconds, and start the exposure with a remote. You’ll feel the difference right away—and you’ll stop blaming the camera for softness caused by movement.
Internal links: If you want to level up your night workflow too, check best lenses for low-light photography gear reviews and how to build a night photography setup. For travel sessions where you’re changing gear fast, my tips in how to protect your photos on the go help keep your files safe after the shoot.
Featured image alt text: Tripod Buying Guide for Sharp Night Photos showing stable legs, locked head, and vibration control setup at night.