Here’s a surprise that keeps showing up on my shoots: the “better” light setup isn’t about brightness. It’s about timing.
Strobes freeze motion and let you shape one crisp slice of time. Continuous lights help you compose with what the camera sees every second. So the real question is: which one gives you better creative control for your shoot style?
My quick answer: if you’re mostly doing portraits, sports, and studio work where you want sharp edges and fast shutter speeds, strobe wins. If you’re shooting video, events where you need to react in real time, or scenes where your lighting changes during the take, continuous lighting wins.
Strobe vs continuous lighting: the creative control difference in plain terms
Strobe creative control comes from power and timing. A strobe is a light flash that lasts a very short time, often around 1/1000s to 1/20,000s depending on the model and settings.
Continuous creative control comes from seeing the light live. You watch highlights, shadows, and color as they change because the light stays on.
In real life, that changes how you plan a shoot. With strobe, you plan the shot like a snapshot. With continuous, you plan it like a video take.
Quick comparison: when strobe beats continuous (and when it doesn’t)
Use strobe when you want control of sharpness, flash power, and off-camera light patterns. It’s also easier to overpower daylight in many setups.
Use continuous when you need consistent exposure while you track action, when white balance must stay stable, or when you need to see the look instantly.
| What you shoot | Best “creative control” choice | Why it feels better |
|---|---|---|
| Portraits (studio or on location) | Strobe | Flash duration freezes micro-movement and gives crisp skin detail. |
| Weddings (candids + some formals) | Split approach | Strobe for formals and motion-free shots; continuous for video and quiet moments. |
| Product and tabletop | Strobe or LED continuous | Strobe makes it easy to stop reflections; continuous helps you place shadows. |
| Video-heavy work | Continuous | You see the lighting on faces and scenes while you move. |
| Sports / fast action stills | Strobe (special case) or high-speed continuous | Strobes can freeze motion; continuous needs faster specs and higher power. |
Creative control in portraits: strobe for crisp shaping, continuous for “see it first”
Portraits are where strobe often wins, especially if you like clean catchlights and sharp detail.
I shoot a lot of headshots and small-boutique portraits. When I switch from continuous to strobe, the biggest change isn’t the look. It’s how confidently I can shoot at lower ISO with a faster shutter speed while still keeping the face sharp.
For example, in a small room with one window, I can set my camera at 1/200s or even 1/320s (depending on flash sync limits) and let the flash do the heavy lifting. The subject moves slightly—hair shifts, a blink happens—but the flash duration helps keep the photo crisp.
Strobe setups that give tight creative control (portraits)
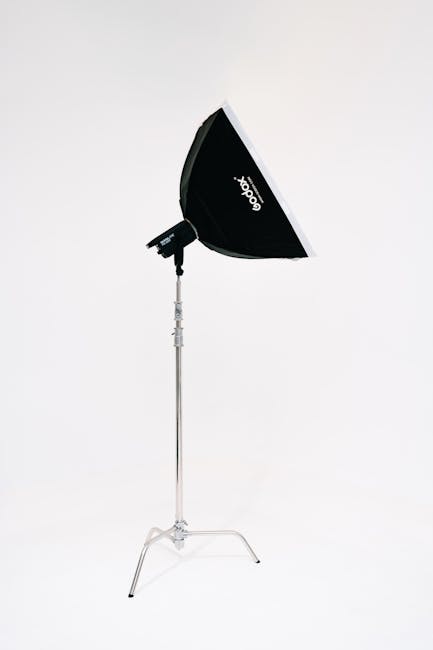
Strobe control is mostly about light size and power ratio. A softbox gives gentle transitions. A bare speedlight or stripbox gives more shape.
Here are choices I make often in 2026:
- Main light: 3–5 ft (1–1.5 m) from the subject with a medium softbox. Start with it slightly above eye level.
- Fill: Either bounce off a reflector or use a second strobe at 1 stop to 2 stops under the key. (I like the fill lower so skin still looks dimensional.)
- Background: Rim light or a separate background light if you want separation.
If you’re using a system like Godox AD200/AD300 class strobes or an entry studio pack, set your test shots with a tight plan: keep the camera settings fixed (ISO + aperture), then only adjust strobe power for exposure.
What most people get wrong: they change camera settings too much. If you change ISO and aperture every time, you lose the “repeatable look” that gives true creative control.
Continuous lighting portrait workflow (and why it can feel easier)
Continuous lights feel smoother because you see the lighting as you pose. That matters when the subject is moving slowly or when you’re working with clients who change expressions often.
If you use LED panels or LED tube lights (think Godox/Neewer/Fancier-style LED lights, or higher-end units), put one light where you want the key and then watch the face in the viewfinder. Adjust distance and angle based on shadow edges.
But continuous control has a cost: you often need higher ISO or wider apertures to get the same exposure. Also, some LEDs flicker at certain shutter speeds, though good modern lights and correct shutter settings help a lot.
Creative control for weddings and events: fast, safe, and consistent beats “perfect”
Event lighting is a tradeoff between control and speed. You don’t have time to dial in a lab setup while the moment is happening.
I’ve shot receptions with both. Strobe gives me a cleaner look for posed portraits and stage-like scenes. Continuous lights helped more when the venue is always changing and when I was also recording video.
One important reality check: events often include mixed lighting (tungsten bulbs, LEDs, daylight coming through windows). White balance jumps around. That’s not a strobe vs continuous problem as much as it’s a “mixed color environment” problem.
When strobe helps most at weddings
Strobe helps when you need subject exposure now. You can keep your camera settings stable and let flash power handle the exposure.
Try this with off-camera speedlights or compact strobes:
- Use a wider aperture like f/2.8–f/4 for subject separation, and set ISO based on your room brightness.
- Keep shutter at or below your camera’s flash sync limit (or use high-speed sync if you need it, but expect lower effective power).
- Place the light to match eye direction. If you’re facing the couple, put light slightly toward their faces, even if you’re bouncing off ceilings.
My “control move” is making a simple lighting recipe and repeating it. If you can nail it for one couple, you can nail it for ten.
When continuous helps most at events
Continuous shines during video and “in-between” moments. If you’re filming vows, speeches, or dancing with motion, watching the light live is a big advantage.
If you run continuous LEDs, protect your workflow:
- Lock your white balance. Auto WB can drift during video takes.
- Check flicker. If your shutter speed or frame rate gets odd, you can see banding.
- Use a dimmer or lower output to match your camera without blowing highlights.
Product photography and tabletop: strobe for reflection control, continuous for shadow placement
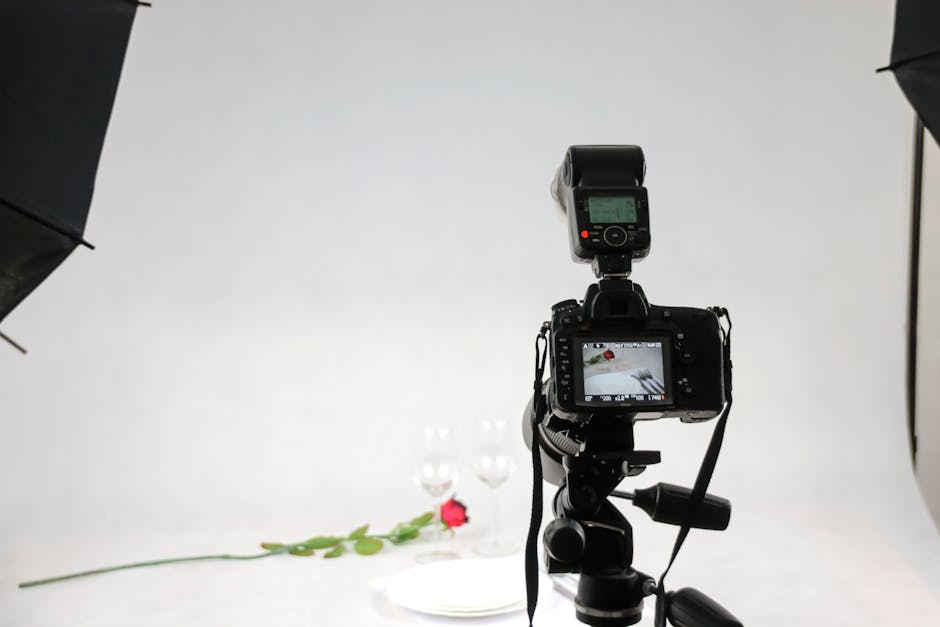
Product work is where “creative control” shows up in tiny details. The right light angle can make a bottle look premium—or cheap.
Here’s the key difference: reflections don’t care about your intent. They care about the shape of the light source and the exact angle of the surface.
Strobe for product: make the highlights behave
Strobe makes it easier to shoot at settings that freeze everything. Even if nothing moves, a strobe lets you keep shutter speeds fast, and that can reduce blur if you’re doing macro with small movements.
I’ve had good results with strobe + controlled modifiers:
- Use flags (foam boards, black cards) to cut unwanted glare.
- Control distance between the light and the product. A closer light source makes reflections bigger.
- Bracket power instead of changing aperture wildly. It keeps your depth-of-field consistent.
If you’re shooting glossy items (watches, phone cases, polished metals), strobe plus precise angles gives me the most repeatable results.
Continuous for tabletop: build the look while you watch it
Continuous lights make shadow placement feel like sculpting. You can move a lamp, softbox, or LED tube and watch the shadow shape change instantly.
This is also great for learning. If you’re newer, continuous helps you connect the lighting angle to the mood.
But watch heat. Some older halogen-style setups can warm products and change how liquids behave. LED continuous is much easier on that front.
Creative control for video: continuous gives real-time confidence, strobe demands planning
For video, continuous lighting usually delivers better creative control. Your exposure and look are locked to what you’re seeing while the camera rolls.
In video, you’re not just taking a photo. You’re holding the light consistent across frames.
Continuous video lighting workflow I actually use
Set it up like this and you’ll waste less time:
- Pick a white balance (for example 4300K for mixed tungsten-to-window looks, or a fixed Kelvin value). Keep it fixed during the shoot.
- Set your camera exposure on a test shot and leave ISO alone if you can.
- Use the light dimmer or distance to fine-tune brightness instead of hunting with exposure tools every take.
If you use an LED panel with multiple output levels, set the level you like and then avoid touching it unless the scene changes.
Can strobe work for video?
Yes, but it’s not “set it and forget it.” Strobe for video usually needs specialized sync and often looks like a strobe “look,” not a natural continuous glow. Some shooters use it for stylized motion effects.
If your goal is cinematic realism, continuous LEDs win for most people.
People also ask: strobe vs continuous lighting
Is strobe better than continuous for photography?
Strobe is better for sharp, controlled stills in most photography cases—especially portraits and studio scenes where you want consistent results and can manage flash exposure.
Continuous is better when you need to see the lighting live or when you’re doing video and want one setup to cover it.
Which is easier to learn: strobe or continuous?
Continuous is easier to learn because you see the light immediately. Strobe can feel confusing at first since the flash is brief and you’re often judging exposure from test shots.
Once you understand distance-to-subject and power ratios, strobe gets easier fast. The control becomes more repeatable.
Do I need expensive gear to get good creative control?
You don’t need the most expensive lights, but you do need consistency. A cheaper strobe system that you can trigger reliably and repeat settings with is better than a top-end light you can’t set up quickly.
If your triggers fail or your battery dies at the wrong moment, your “control” disappears.
Choosing the right setup for your shoot style (a simple decision guide)
Use this to decide in under 2 minutes. Start with what you shoot most, then pick the lighting type that gives you the control you care about.
If you shoot mostly portraits
Pick strobe first. Choose a key light with a soft modifier and add a second light only after you can repeat your results.
If you also do lots of video, consider a mixed kit: continuous LEDs for video, strobe for still portraits.
If you shoot weddings and events
Lean strobe for still moments and continuous for video segments. This keeps your look consistent while giving you speed when things change.
Don’t try to do every style with one light if it slows you down.
If you shoot product and tabletop
Pick based on your biggest pain point. If reflections ruin your images, strobe often gives more control. If learning angles and shadow shapes matters most, continuous helps you see it instantly.
If you shoot video constantly
Pick continuous. Your creative control comes from seeing what the camera records while you move.
What most people get wrong when comparing strobe vs continuous
The biggest mistake is comparing “brightness” instead of “results.” Two lights that read the same on paper can look very different once you add modifiers, distance, and camera settings.
Here are the errors I see over and over:
- Changing camera settings every test: then you can’t tell what the light did.
- Using the wrong modifier: a hard light through a small diffuser won’t look soft no matter what you call it.
- Ignoring power limits: continuous LEDs run out sooner for darker scenes. Strobe systems often scale better when you need more punch.
- Forgetting sync and shutter behavior: some cameras hit limits with flash sync and some LEDs show flicker at certain frame rates.
If you want better creative control, keep your camera settings stable during tests and change only one lighting variable at a time.
A practical kit pairing I recommend (2026-friendly)
If you’re building a kit today, the smartest path for many photographers is “one light type for speed, one for visibility.”
For example:
- Strobe pack + modifiers for portraits, product stills, and event formals. Brands vary, but look for reliable triggering and fast recycle time.
- One strong LED continuous for video, walk-and-talk moments, and anytime you need live lighting checks.
I keep this mindset because my clients don’t care what light I used. They care that I nail the look quickly and keep moving.
Battery life, heat, and setup time: the control you feel
Creative control isn’t just the image. It’s also your setup time. A light that’s perfect on a desk won’t help if it’s too slow to deploy in real venues.
In 2026, many photographers want portability. Strobes with good battery packs (and chargers you can actually carry) are a practical advantage on location. Continuous lights can be great too, but they can drain power faster depending on output.
Heat matters less with modern LEDs, but with any light that runs hot, you need to think about where you place it around people and products.
Internal tips: keep your gear data safe (yes, this matters)
When you’re testing lighting setups, you also create files and backups. I treat lighting workflow as part of my photo cybersecurity routine.
If you want practical steps, check out backups and ransomware protection tips for photographers. Losing a whole shoot day because a laptop got hit is brutal.
Also, when you’re saving lens and lighting presets, store them in more than one place. That’s a control move too.
Related gear and tech reads you’ll probably like
If you’re comparing lights, you’ll also care about related setup details. Here are two helpful topics on our site:
- best softboxes for portraits (and which sizes actually change the look)
- how to set white balance for mixed lighting (this matters a lot in events)
Conclusion: the better creative control depends on what you need to control
Choose strobe when your top priority is freezing motion and shaping light with power and timing. It’s the better tool for most still portraits, crisp studio looks, and repeatable product highlights.
Choose continuous when your priority is real-time visibility and consistent control across a moving scene. It’s the better tool for video, events where you must react fast, and learning lighting angles with fewer test shots.
If you’re unsure, do this one actionable test next time you shoot: pick one subject, keep your camera settings constant, and run a short strobe test and a short continuous test. Compare shadow shape, catchlights, and how fast you reached “client-ready” results. That comparison will tell you which path gives you better creative control for your shoot style.
