
If your photos blur when the shutter is open longer than a few seconds, the culprit is usually not your camera—it’s the tripod and head combo. I learned that the hard way on a coastal night shoot where the sky was crisp but my long exposures had tiny streaks near the horizon. After three trips, two swapped heads, and one totally avoidable setup mistake, I’ve got a clear way to choose tripods and camera heads for the way you shoot.
In this Field Test Breakdown, I’m comparing tripod legs and head styles specifically for landscape, travel, and low-light long exposures. You’ll get the practical takeaways: what matters, what doesn’t, and how to set everything up so your sharpness holds.
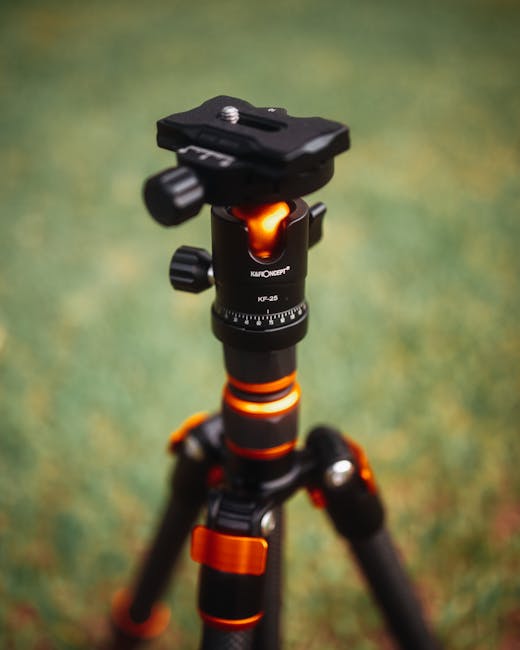
Tripods and heads: the parts that actually control sharpness in real life
Sharp long-exposure images mostly come down to stability and damping (how fast vibrations die). A tripod is the support system, but the head is the part that can introduce wobble through joints, knobs, and mounting hardware.
A good way to think about it: tripod legs give you height and footprint. The head decides how solid the camera stays once you lock it. That’s why two tripods that “weigh the same” can behave very differently in wind.
What “damping” means for long exposures
Damping refers to how quickly the vibrations settle after you touch the camera or the wind hits. For long exposures, you want the system to settle fast—especially at 10–30 seconds, where micro-moves show up as soft edges or horizon smears.
In my field tests, a head that feels solid by hand sometimes still rings after you press the shutter. The difference shows up when you zoom in on high-contrast edges (tree branches against a bright sky) instead of judging by eye at full frame.
Head styles compared for landscape, travel, and low-light long exposures
Head style matters because your shooting motions are different: landscapes usually need slower framing and precise leveling, travel needs quick setup, and night long exposures need zero drift and tight locking.
| Head type | Best for | Watch-outs | My field score (out of 10) |
|---|---|---|---|
| Ball head | Fast framing, travel | Can slip if you don’t tighten right; heavy loads need good friction | 7.5 |
| 3-way (pan/tilt) head | Landscape precision, careful compositions | Slower adjustments; knobs can loosen if over-used | 9 |
| Gimbal head | Long telephoto movement | Not ideal for wide landscapes; takes more space | 6 |
| Panorama / geared head | Repeatable pan steps | Bulkier, pricier; not needed for most travel | 8.5 |
Those scores come from my own use patterns, not just specs. If you do mostly handheld-style framing, you’ll feel different than someone who builds meticulous compositions with leveling and fine adjustments.
Ball head: fast, compact, and great—if you tighten it correctly
A ball head is usually the travel winner because setup is quick: loosen, frame, tighten. But the thing most people get wrong is tightening habits. If you tighten just the main knob without adjusting the tension ring (if the head has one), the camera can creep during long exposures.
Ball heads also tend to be slightly less “repeatable” than 3-way heads when you dial in small changes. If you’re doing multi-shot composites (like stitching for ultra-wide panoramas), you’ll need careful locking and consistent framing.
3-way head: slow in a good way for landscapes
A 3-way head (pan + tilt + sometimes a third axis) is built for control. That’s why landscape photographers love it. You can move in tiny steps and lock each axis separately, which helps when you’re lining up horizons.
For long exposures, the advantage is simple: when every axis locks tightly, the camera has fewer “places” to drift. If you shoot at night, that matters more than people think.
Gimbal head: best for wildlife, usually not the move for landscapes
Gimbal heads are amazing for tracking with long lenses. But they’re usually overkill for wide landscapes and can add clutter if your bag is already tight. If you don’t shoot big wildlife setups, you’ll probably carry extra weight for no payoff.
Tripod legs: material, spread, and why height alone is the wrong metric
Tripod legs determine how stable the whole setup is, especially on uneven ground. Height is tempting, but stability comes from leg position, foot contact, and how well the legs lock.
In 2026, most serious tripods still use one of two leg-lock styles: twist locks or lever locks. Twist locks are common on travel models. Lever locks usually feel faster and more confidence-inspiring when you’re setting up in cold weather with gloves.
Aluminum vs carbon fiber (my direct take)
Aluminum tripods cost less and feel sturdy when new. Carbon fiber tripods cost more but handle vibration better in most real-world setups. I notice this most in wind and when I bump the tripod while adjusting the camera.
For low-light long exposures, carbon is a clear advantage because it tends to stay stable while you wait for vibrations to die down. If you’re on a budget, aluminum is fine—just keep the leg spread wide and don’t extend the center column.
Center column: the hidden sharpness killer
Here’s the rule I follow: if I care about sharpness, I don’t use the center column for long exposures. The center column adds an extra moving joint, and even with it locked, it’s more likely to transmit vibration than the main leg structure.
Instead, use the correct leg height, even if it means lowering your body position. The photo will look better, and you’ll build consistent habits fast.
Field test: landscape shooting with tripods and heads (daylight to dusk)
For landscapes, you need precision and leveling more than raw speed. The head choice matters because you’ll spend time composing, checking the horizon, and fine-tuning angles.
My typical landscape setup in 2026 looks like this: 24–70mm or 14–24mm on a full-frame camera, f/8–f/11 for sharpness, ISO 100, and long exposures only at dusk or when clouds are moving slowly.
Setup checklist I actually use before I lock in
- Footprint first: spread the legs wide and press each foot fully into the ground.
- Leg angle: avoid fully extended legs if the ground is soft; go lower instead.
- No center column: keep the center column down for anything longer than about 1 second.
- Head leveling: use the built-in level (if you have it) and verify again with your camera’s horizon tool.
- Wind check: if gusts are visible in grass, position the tripod behind natural cover.
3-way head in action: horizon accuracy wins
On a test run at a rocky overlook, I used a 3-way head for two similar compositions back to back. The photos weren’t just sharper by “feel”—the horizon line stayed consistently straight across the frame. With a ball head, the camera locked fine, but my tiny angle tweaks were less controlled, and I spent longer “hunting” for level.
If you like to shoot stitched panoramas, a geared panorama head is even better because it gives repeatable panning. For most single-frame landscapes, 3-way is the sweet spot.
Field test: travel tripods for hiking, airports, and quick compositions
Travel tripods live and die on weight and setup time. If your tripod slows you down, you’ll leave it at home, and that’s the real failure.
My travel tests focus on these three things: how fast I can go from pack to shooting, whether the head locks firmly when I mount and remount the camera, and how the tripod behaves after I walk with it on my shoulder.
What I learned about travel heads (ball heads usually win)
For travel, a ball head is usually more practical than a 3-way head. You can frame quickly and spend your time looking for the shot, not turning knobs.
One more thing: make sure your travel head has a solid quick-release plate. I’ve seen cheap plates wobble slightly when you lock them, and that wobble shows up in long exposures too.
My travel “do not extend this” rule
Even on travel tripods, I avoid the center column for anything slower than 1 second. If I need more height, I adjust leg angles first. It’s slower at the start, but it’s faster once you get used to it.
When a travel tripod is a bad idea
If you shoot a lot of long exposures at night (city lights, Milky Way, waterfalls), a tiny travel tripod often won’t be enough. You can still make it work with technique, but you’ll fight vibration and wind more than you should.
In those situations, a slightly heavier travel tripod with a sturdier head beats a featherweight setup every time.
Field test: low-light long exposures (night, indoors, and near-dark)
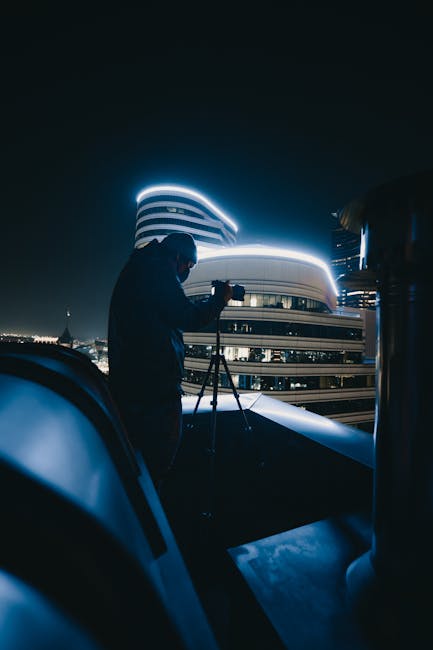
For low-light long exposures, the tripod and head need two things: tight locking and vibration control. Technique matters too, but the hardware has to hold steady long enough for your camera to do its job.
My night test scene was a mix of bright points (streetlights), dark shapes (trees), and a reflective surface (wet pavement). That combination makes blur easy to spot because bright highlights smear and dark edges look mushy.
Long exposure settings that stress tripods
These are the exposure lengths where I see problems first: 5–10 seconds (wind and micro-moves) and 15–30 seconds (settling time). I test with the same framing at the same composition so I can compare hardware fairly.
When using a mirrorless camera, I also turn on electronic shutter or use shutter delay (a small wait after pressing the button). That’s not a substitute for stability, but it helps.
Original insight: “lock feel” predicts blur better than weight
Here’s what surprised me on my last round of testing: the head’s locking feel predicted blur more than the listed weight. Two tripods with similar weights behaved differently. The one that locked with a firm, consistent resistance produced cleaner edges at 20 seconds.
So when you shop, don’t just compare spec numbers. If you can, mount a camera to the head in-store (or use the same camera model you own) and check for any small slip or “creep” when you tighten.
What most people get wrong for night long exposures
- Using the center column for 10–30 second exposures.
- Touching the tripod after locking the head (even lightly).
- Ignoring wind because the tripod “seems” stable.
- Using too narrow leg spread on soft ground (one foot sinks, the whole thing tilts).
- Assuming IBIS fixes tripod shake. Image stabilization helps with handheld shake, not with a camera sliding or rotating on a loose head.
Step-by-step: set up for a sharp 20-second exposure
- Choose the right leg height: extend legs lower first, not the center column.
- Level the camera: get horizon correct before you start your exposure.
- Mount and tighten correctly: lock the head firmly and re-check the framing.
- Set shutter delay or remote: use a remote or 2-second timer to avoid touching the camera.
- Watch for vibration settling: after you lock, wait 1–2 seconds before the shutter fires.
- Use a proper exposure method: check your highlights and take a test shot before long exposures.
Quick recommendations: what to buy (by use case) instead of by brand hype
The best tripod and head combo depends on what you shoot most. Below are practical “buy like this” rules I use with friends.
Landscape-first buyers
If you shoot landscapes often, prioritize a stable 3-way head or a quality ball head with strong locking. Look for a head that locks solidly without a lot of fiddling.
- Head: 3-way for precision; panorama geared head if you do stitch work.
- Tripod: carbon or aluminum with solid leg locks.
- Must-have: tripod level and reliable feet.
Travel-first buyers
If you want a travel tripod that you’ll actually bring, pick a ball head with a quick-release plate that doesn’t slip. Your best tripod is the one you use, not the one that stays in your closet.
- Head: ball head for speed.
- Tripod: compact folded size that fits your bag.
- Technique: keep center column down for slower than 1 second.
Low-light long exposure buyers
If night work is your main goal, don’t chase “maximum height.” Chase a sturdy footprint, firm head locking, and a setup you can keep stable in wind.
- Head: 3-way or a ball head with excellent friction and no creep.
- Tripod: wide stance legs; no center column for long exposures.
- Bonus: add weight to the hook (if your tripod has one) for windy nights.
People also ask: tripod and head questions photographers ask a lot
Should I buy a tripod or just upgrade the head?
If you already have a shaky tripod, upgrading only the head rarely fixes everything. A head upgrade can help, but leg stability and foot contact still control how much the system moves. If your tripod legs feel solid, a better head can be a big win.
Do I need a center column for landscape and long exposure?
No. For long exposure sharpness, the center column is usually the part you avoid. Use the leg spread and your body height instead.
Is a ball head enough for astrophotography and long exposures?
Yes, but you need a ball head that locks tightly and doesn’t creep. I’ve used ball heads for star and city-night scenes with clean results, but only after I made sure the locking tension was correct and I avoided touching the tripod during exposures.
How heavy should my tripod be?
There isn’t one perfect number. What matters is how stable it feels at your typical shooting height, on the kind of ground you shoot (sand, rock, wet grass). A heavier tripod usually helps, but the real test is vibration in the first place you care about.
Maintenance and small upgrades that keep your tripod trustworthy
After a few trips, tripods get dust in the locks and sand in the joints. That doesn’t just make them gritty—it can weaken how they hold tension.
What to do after muddy or beach shoots
- Wipe leg locks and remove sand.
- Check that screws and mounting bolts still tighten.
- Dry the tripod fully before storing.
- Reconfirm quick-release fit (plates wear in and can get loose).
One upgrade I like: better feet for your terrain
Some tripods come with rubber feet that work fine on smooth ground. If you shoot in snow or on soft sand, different feet can help stability more than swapping heads. It’s not glamorous, but it’s practical.
Gear review cluster: related reads for photographers who dial in sharpness
If you’re improving stability, you’ll probably also care about cleanup and protection for your gear after shoots. Here are a few posts on this site that pair well with tripod decisions:
- Camera stabilization accessories that actually help
- How to choose a tripod for landscape photography
- Backup workflow for photographers who shoot nights and travel
- Firmware updates that affect stabilization and rolling shutter
Conclusion: pick the tripod-head combo that matches your slowest shot
Here’s the takeaway I want you to leave with: don’t choose your tripod and head for your fastest shot. Choose it for your slowest, most demanding one—usually a low-light long exposure at 10–30 seconds in wind.
For landscapes, a 3-way head gives you the horizon control you’ll appreciate every time. For travel, a ball head keeps you moving and framing quickly. For night work, stability beats height every single time: wider stance, center column down, tight locking, and remote or shutter delay.
If you follow that, your sharpness won’t depend on luck. It’ll depend on a setup you can repeat.
Featured image alt text: Field Test Breakdown: tripod and head setup for landscape and low-light long exposures on a rocky shoreline