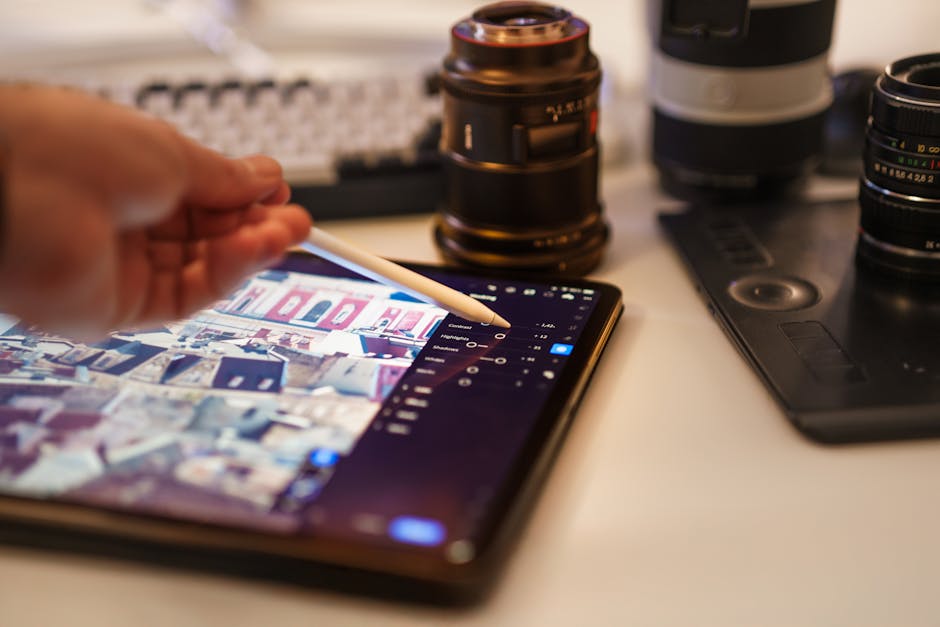
You know that moment when a photo looks “way too perfect” on your phone—then you bring it into your editor and it doesn’t behave the way you expect? That’s the real story behind computational photography. AI processing is doing a lot of work before you ever see the image, and it changes what detail means, how color lands, and how much control you actually have.
In short: computational photography uses smart image processing (often AI-driven) to combine signals like sharpness, noise, and color into one final picture. The good news is you’ll often get better results fast. The tricky part is learning where that “help” steals your control. Below I’ll break down what’s happening, what to watch for, and how to edit with intention in 2026—especially if you shoot real scenes like sports, night street light, or indoor portraits.
Computational Photography + AI Processing: the plain definition
Computational photography is a way of making photos using more than one raw capture and smart software to produce the final image. It often includes stacking (taking multiple frames), noise reduction, sharpening, and color correction. AI processing refers to machine-learning models that guess what the best version of a scene should look like.
On many modern phones, the camera app saves either:
- A “final” processed file (JPEG/HEIC) created by AI and other algorithms.
- Or a mix where you can also save the raw data (like RAW/ DNG) depending on the device and app.
Here’s the part people miss: even when you shoot “RAW,” some apps still apply their own look for preview and sometimes for exported files. In my workflow, I always check whether the file I’m editing is the real sensor data or a processed version with AI baked in.
Detail: why AI can make edges look sharper but textures look “smoothed”
AI processing changes detail in two opposite directions: it can boost edge crispness while also reducing fine texture. You can see it most clearly on hair, fabric weave, wood grain, and clouds in harsh light.
When computational photography runs, it often does noise reduction first. Noise reduction is great—until it guesses that tiny contrast changes are “noise” and removes them. Then the sharpening step may add crispness back, but it can sharpen the wrong things.
I’ve seen this when photographing ski gear in winter. The final image looks tack sharp at a glance, but the knit texture on gloves turns into a kind of uniform pattern. If you zoom in on the raw preview, you’ll sometimes notice the “micro-contrast” is lower than expected.
What “detail” actually means after AI processing
Detail after AI processing is usually a mix of:
- Edge contrast (how bright-to-dark the boundary looks).
- Micro-contrast (tiny texture differences across a surface).
- Noise pattern (grain that the algorithm may treat as texture).
If the model prioritizes edge contrast, you get crisp outlines. If it treats micro-contrast as noise, textures flatten. This is why two photos can both be “sharp” but one feels more real.
Fast tests you can do at home (2 minutes each)
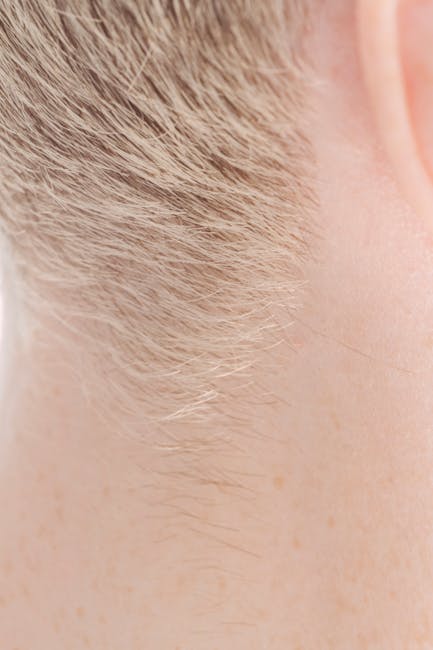
- Hair test: Take a photo of a friend with hair against a plain wall. Compare eyes, strands near the edges, and the hairline. If strands turn into smooth blocks, the AI is smoothing.
- Fabric test: Shoot a sweater or denim. Zoom in and look for repeated weave patterns. If the pattern loses rhythm, texture was reduced.
- Night sign test: Photograph text on a sign at night. Look at letter edges and halos. AI sharpening can make halos worse around bright areas.
These tests matter because the “detail” setting you see in your editor may not recover what AI removed. Once the fine texture is gone, you’re mostly guessing it back.
Color: why AI changes skin tones, whites, and “natural” saturation
Color is where AI processing shows its opinion. It isn’t only correcting white balance; it’s also deciding how saturated and believable each part of the scene should look.
Many computational pipelines adjust color in local areas. That means skin tone may get nudged differently than the background. It also means the sky can look more “dramatic” than the real sky, and indoor light can shift toward a smoother warmth.
In 2026, most people expect that look. But if you’re a photographer who prints, sells, or needs consistent color between shots, AI decisions can create problems.
Common color behaviors I see in real shoots
- Skin goes too even: Fine color variation in pores or subtle shadow tones can get flattened. The face looks clean, but you lose depth.
- Whites get “protected”: Bright highlights may be pulled back so they don’t clip. That’s good. The downside is it can reduce sparkle in real specular highlights.
- Neon can turn weird: AI often tries to “beautify” saturated lights. Sometimes it increases green-magenta shifts, especially near signage.
If you shoot anything with strict color needs (like product photos, branded colors, or event timelines you want consistent), color control becomes a bigger deal than detail.
How to keep color consistent across a set
Here’s my practical approach using common tools:
- Pick one camera output style: If your phone offers RAW and a separate “computational” mode, choose one path for the whole shoot.
- Use a color target once: In your next test session, include a small color card (even a cheap one) in the frame. Shoot under the same light you’ll use for real photos.
- Edit in a color-managed workflow: Use a tool that respects color profiles (I’m thinking Lightroom-style workflows, Capture One style workflows, or any editor that lets you set a working space).
- Lock your white balance: If AI baked in a warm look, don’t chase it scene by scene. Pick a reference shot and match to it.
This is also where my cybersecurity side comes in. If you’re sharing work to clients through links, keep in mind that “AI-enhanced” previews you upload can leak metadata. If you want, check our guide on keeping photo metadata safe when sharing (same site section theme: cybersecurity for photographers).
Editing control: where AI makes your sliders less honest
The biggest frustration is when you edit and your usual sliders feel weak or unpredictable. With computational photography, parts of the image may already be “hallucinated” or heavily transformed.
Two examples:
- Noise reduction: If the AI removed noise, raising clarity won’t bring back grain. It will often make edges look crunchy.
- AI sharpening: If the pipeline already sharpened, adding more sharpening can create outlines and halos.
This is why I tell people to check what they’re editing. If the file is already processed, your editor isn’t wrong—you just don’t have the same raw information anymore.
What to look for in your files (a quick checklist)
- Do you see “AI” in the camera mode name? It’s usually not subtle.
- Is the file size much bigger than a normal RAW? Processed outputs often have different compression patterns.
- Is the preview sharper than the exported image? That mismatch can mean the app uses AI for preview only.
- Are there “enhancement” artifacts? Look for skin smoothing, odd eyes in portraits, and texture smearing on patterned clothing.
Step-by-step: how to get control back in post
- Start with a light touch: Reduce sharpening first. If your editor has a “sharpening” or “clarity” slider, pull it down a bit.
- Recover shadows carefully: AI often brightens shadows. Lower exposure or shadow sliders can bring back contrast, but go slow to avoid banding.
- Fix white balance after detail: Color adjustments can change how “detail” looks to your eyes. I usually correct color last, after contrast.
- Use local edits for the problem areas: If skin looks too smooth, add a tiny bit of texture with local adjustment, not across the whole image.
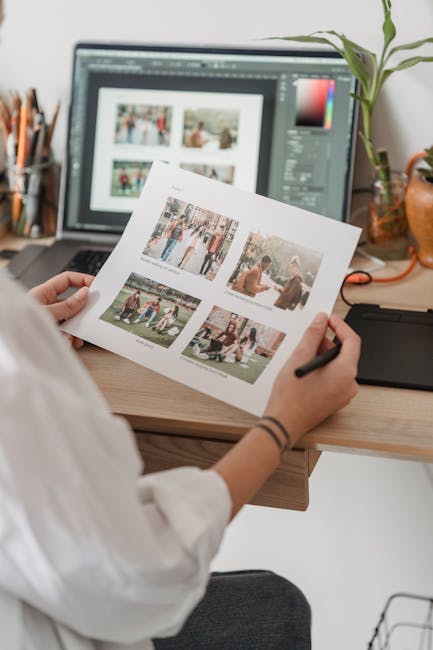
- Export test sizes: A 1080px web export can hide problems that show up at 3000px or print size. Export at least one “large” version when you care about quality.
My opinion: the best control comes from starting with the least-processed input you can reliably get. If your camera can save both computational JPEG and RAW, compare them on the same subject and decide which you’ll trust for editing.
AI artifacts to watch for (and how to spot them in seconds)
Artifacts are the giveaway that computational photography made an educated guess. Some artifacts are subtle. Some are obvious right away.
Top artifact types and what they look like
- Texture smearing: Fine details blur into a soft blob. Common on hair and fabric patterns.
- Edge halos: Bright outlines around high-contrast edges, especially in night scenes.
- Over-smooth skin: Faces look like plastic even when everything else looks sharp.
- Sky “painting”: Clouds look airbrushed or repeat patterns appear in gradients.
- Weird bokeh: Portrait mode effects can change the background blur and edges around glasses or hair.
People Also Ask: How do I turn off AI processing?
Answer: In most cases you can’t fully “turn off” computational photography on newer phones, but you can reduce it by choosing a RAW mode, turning off beauty/scene enhancements, or switching to a manual camera app that exposes raw capture options.
Here’s the reality check: some devices still apply noise reduction and lens corrections even in “RAW.” That’s normal and usually not a problem. The goal is to disable or limit the extra AI layers like face smoothing, stylization, or aggressive enhancement.
If you’re using a dedicated camera (not just a phone), many cameras can save RAW with minimal processing. For mobile shooters, the trade is convenience vs control.
People Also Ask: Does AI ruin RAW files?
Answer: RAW data is usually sensor data, so it’s not “ruined,” but your camera app might still apply AI for preview or export. The fix is simple: confirm what file you’re editing and compare the RAW export to the phone’s processed JPEG side-by-side.
I do this whenever I test a new phone or app. I shoot the same scene, then I open both outputs in my editor. If the “RAW” export looks identical to the processed file, your app is still doing heavy lifting behind the scenes.
People Also Ask: Can I get true manual control on computational photos?
Answer: You can get close, but you’ll never get back the detail that AI removed. Manual control works best when you start with less-processed input (true RAW) and use post editing to shape the image, rather than trying to rebuild what’s already guessed.
Practical workflows for photographers (phones, cameras, and hybrids)
The workflow matters more than the marketing. If you want predictable results, you need a repeatable process for capture and export.
Workflow A: You shoot a phone for speed, but you edit like a photographer
- Capture: Use RAW if available. If not, at least disable beauty filters and “scene enhancement.”
- Sort fast: Cull images at 100% view on your phone or computer to catch artifacts early.
- Edit: Reduce sharpening/clarity first, then set white balance, then add contrast.
- Export: Export both web and large sizes when detail matters.
Workflow B: You shoot a dedicated camera and still see AI in your pipeline
Even with mirrorless or DSLR setups, AI can sneak in through:
- In-camera lens corrections and denoise.
- Editor “smart” tools like face detection, masking, or noise reduction.
- Third-party apps that auto-enhance on export.
I’ve learned this lesson the hard way: I’ll set up a perfect exposure, then an app adds noise reduction that changes fine fabric detail in a way I don’t notice until print day. Now I turn off any one-click “enhance” features for client work unless I’ve tested them on real scenes.
Comparison table: AI-heavy output vs RAW-first output
| Goal | AI-heavy computational output | RAW-first workflow |
|---|---|---|
| Fast sharing | Often ready immediately, great for social | Needs post, slower but more controlled |
| Detail in textures | May smooth micro-texture | More likely to keep real texture |
| Night scenes | Good at reducing noise, may create halos | Better for careful recovery; more work |
| Color matching | Can vary between scenes due to AI guesses | More consistent with white balance strategy |
| Editing control | Some sliders feel limited or “nonlinear” | More predictable adjustments |
What most people get wrong about computational photography
Most people judge AI only by how the photo looks at 100% zoom. That’s part of it, but not the full story. You also need to judge how the photo holds up after editing, printing, and viewing on different screens.
Here are the three common mistakes I see:
- Over-trusting “sharpness”: A photo can look sharp because edges were enhanced, not because real texture is present.
- Editing the wrong file: People apply a heavy HDR look to an image that was already tone-mapped by AI, then wonder why skin and skies fall apart.
- Not testing with the same subject: If you never compare the same scene across modes, you can’t tell whether improvements are real or just different lighting.
If you’re into gear and technique, this connects nicely with our gear reviews for hybrid shooters. In practice, the “best” camera isn’t just specs—it’s how you keep control of the output.
How to choose the right settings in 2026 (without getting lost)
Use fewer settings, test more often. Computational photography pipelines change with firmware updates, and models can change too. In 2026, the best approach is to lock your workflow and run small tests after updates.
A simple setting strategy
- Turn off beautify/smoothing when you care about real texture.
- Prefer RAW when it’s available for anything you plan to edit heavily.
- Use consistent lighting for comparisons (same time of day if possible).
- Keep the same export size when judging detail.
Also, remember limitations: if you’re shooting a fast-moving subject like a kid running through branches, computational stacking may fail and produce ghosting. In those moments, the “perfect” pipeline can become a liability.
Real-world scenarios: what AI processing changes most
Here are the situations where I see the biggest differences between AI-heavy processing and RAW-first control.
Scenario 1: Indoor portraits under mixed lighting
Mixed lighting (LED + tungsten, or sunlight + bulbs) is hard for white balance. AI often smooths and normalizes colors, which looks flattering. But if you need accurate skin tones for client edits, you’ll want RAW and a controlled white balance workflow.
Try this: shoot a portrait with a color card in the first frame. Then adjust white balance using that card, not your eye.
Scenario 2: Sports and action
Stacking helps noise, but motion can break multi-frame processing. Look for doubled edges on hands and jerseys. If you see that, you’re better off with a mode that prioritizes single-frame capture (or that reduces computational stacking).
This is one reason I like reading imaging news about sensor and ISP updates. Firmware changes can shift how motion is handled.
Scenario 3: Night street scenes with bright signs
AI often reduces noise and pulls highlights back. That’s useful. The trade is halos and “painted” gradients around bright edges.
If your photos show halos, try reducing sharpening and contrast in the edit, and consider exporting with less aggressive enhancement.
Conclusion: a control-first takeaway for your next shoot
Computational photography is not the enemy. It’s a tool. The win comes when you treat it like a starting point, not the final authority.
My actionable takeaway for your next shoot: pick one workflow (RAW-first or computational-first), test it on the same subjects you usually shoot (hair, fabric, night signs), and then build an editing routine that starts by backing off AI-like sharpening and skin smoothing. When you do that, you’ll keep the best parts of AI—cleaner images—while preserving the detail and color you actually care about.
Note: If you tell me your camera/phone model and your current editor (Lightroom, Capture One, Photoshop, Snapseed, etc.), I can suggest a tight workflow for detail + color control specific to your gear.
Featured image alt text: Computational photography AI processing detail and color control shown on a phone photo editing screen.