If you’ve ever zoomed in on a sky photo and seen a dusty, ghostly blob, you already know the weird truth: dust on the sensor isn’t just annoying—it can ruin photos for months. The good news is that camera sensor cleaning doesn’t have to be scary. I’ve cleaned my own APS-C and full-frame sensors in real life, and I learned the hard way what to avoid.
Here’s the direct answer: clean your camera sensor only when you truly need it, use the safest tools first (clean air, then a proper sensor swab), and stop immediately if you see smear marks or feel any scraping. For heavy contamination, sticky spots, oil film, or repeated smears, it’s time to use a professional.
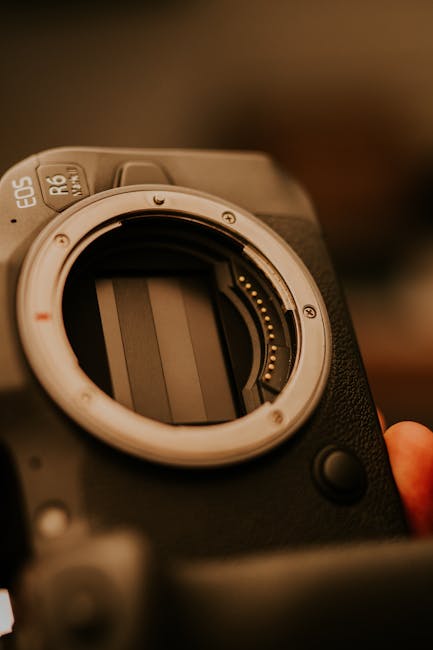
What “camera sensor cleaning” actually means (and why it’s different)
A sensor cleaning is removing dust and other gunk from the sensor’s glass surface. That glass is where light turns into an image. Even a tiny bit of grit can cast a dark or light shape that shows up in photos—especially at small apertures like f/8 or f/11.
As of 2026, most modern cameras have a sensor “self-clean” mode (usually a vibration step to shake loose dust). That’s helpful for loose particles, but it’s not magic. If your photos still show spots after a few cleaning cycles, the problem is often stuck dust, oil mist, or debris that needs a physical method.
When should you clean your sensor? Signs you’re not just seeing normal noise
Sensor cleaning is worth it when the marks are repeatable and stay in the same spot. The key giveaway is a “spot map” that doesn’t move around from one photo to the next.
Try this quick test: photograph a blank light wall or clear sky, then stop down to something like f/11, and take a few shots without changing your framing. If you see the same dark or bright shapes in the same positions, it’s usually sensor dust.
- Dust or grit: spots that stay in the same place across multiple images.
- Lens smudges: marks that change or move with focus and lens angle (often visible on the front element too).
- Sensor “stuck pixels”: tiny dots that show up in any photo, even at larger apertures, and don’t match the dust pattern.
One real-world scenario: I once thought I had dust after seeing blobs in a sunset gradient. It turned out to be a dusty lens filter and a bit of haze on the front element. Cleaning the sensor would’ve been a waste and risk. So before you take the cover off, check the lens and do the simple test above.
Safe camera sensor cleaning steps (my go-to order of operations)
My rule is simple: start with the least risky step and only move up if you still see spots. Sensor cleaning is not a “once and done” job for everyone. It’s more like cleaning a windshield—you do it stepwise until the view clears.
Step 1: Use the camera’s built-in sensor cleaning mode first
Go into your camera menu and run the sensor cleaning routine. Then power off and immediately take another test shot. Many spots vanish after one or two cycles, especially if they’re just loose dust.
Note: Some cameras also offer a “clean at startup” setting. In 2026, that’s still worth enabling, but it won’t replace manual cleaning when debris is stubborn.
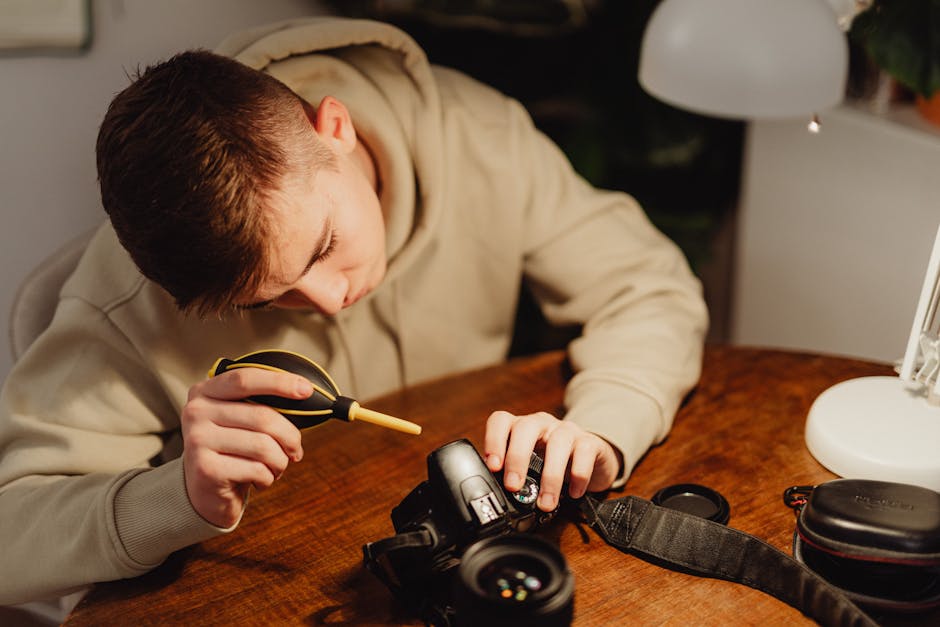
Step 2: Blow dust off with clean air (no guessing, no shaking)
Before touching the sensor, try dry air. Use a bulb blower made for cameras (not an air can with propellant). The goal is to remove particles without dragging them across the sensor.
How I do it:
- Go into sensor cleaning mode so the shutter opens.
- Hold the camera so gravity helps you (angle it slightly downward).
- Use short, controlled bursts with a blower, keeping the nozzle away from the sensor.
This is where people mess up most often. They bring a nozzle too close and accidentally push moisture or grit onto the glass. If you’ve never used a blower before, practice once on the outside of the camera first so you understand the airflow.
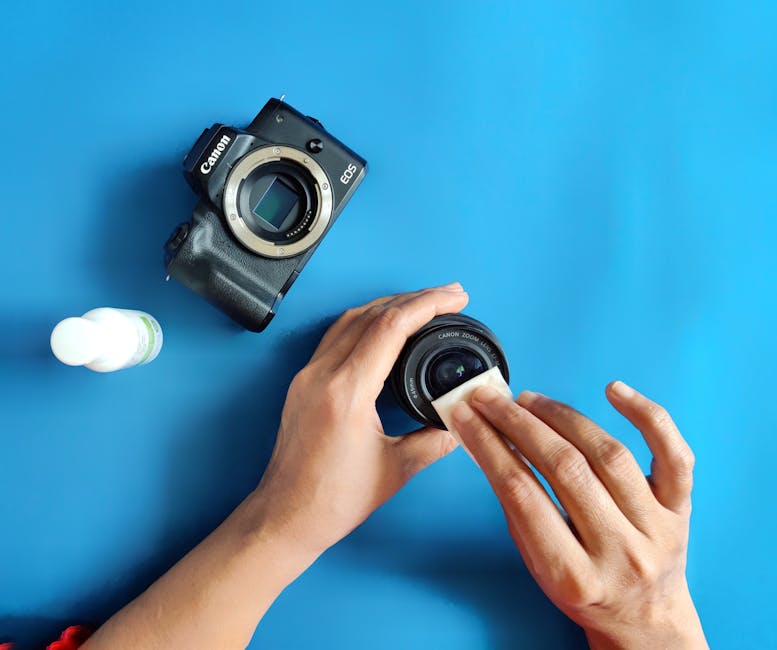
Step 3: Wet clean with a proper sensor swab and sensor cleaning fluid
Wet cleaning is the step that actually removes stuck stuff. Sensor swabs are special because they’re designed for the sensor’s shape and size. Using cotton buds, tissues, or random microfiber cloth is how you end up with scratches or smears that look worse than the original dust.
What you need for a safe clean:
- A sensor swab sized for your camera (APS-C and full-frame often need different widths).
- Sensor cleaning fluid made for camera sensors (not household glass cleaner).
- Nitrile gloves (optional but helpful) and good light.
Here’s the technique that keeps things clean:
- Add the fluid to the swab exactly as the product instructions say. Don’t over-soak it.
- Start the swab at one edge of the sensor.
- Make one steady pass across the sensor surface.
- Flip to a clean side and do a second pass only if the swab instructions allow it.
My practical tip: do not “rub” back and forth like you’re cleaning a countertop. That motion increases the chance of pushing debris into a smear. One clean pass, then stop and check.
Step 4: Take a new test image and repeat only if needed
After cleaning, take another f/11 sky shot. If the dust spots are gone, you’re done. If the marks are still there, don’t keep wet-cleaning forever with the same swab.
Instead, go back one step: try air again first, then swabs again with fresh supplies. Over-cleaning can spread the problem or leave residue.
Common camera sensor cleaning mistakes (and how to avoid them)
Most sensor damage doesn’t come from one big mistake—it comes from tiny habits that add up. Here are the ones I see again and again when photographers ask for help.
Mistake #1: Using canned air or compressed gas incorrectly
Some “air” cans spray liquid as they empty, which can leave wet streaks. Those streaks can bake into a mess that’s harder than the dust you started with.
Fix: use a camera blower bulb for dry air. If you only have a can, don’t take the risk—borrow a blower from a local camera shop or buy one.
Mistake #2: Touching the sensor glass with anything dry
Even if you feel like you’re being gentle, dry contact can scratch coatings on the sensor cover glass. It also drags grains into a line that looks like a permanent scratch.
Fix: wet cleaning should use the right fluid and swab. Dry wipes belong on the outside of the camera, not the sensor.
Mistake #3: Reusing the same swab side after contamination
Once a swab picks up debris, that debris rides along the next pass. It’s like using the same dirty rag on your car window—every wipe spreads the grime.
Fix: if your swab is designed with multiple edges, flip to a fresh side. If you already made contact and see residue, use a new swab.
Mistake #4: Cleaning in a dusty room or near open windows
If you clean near a heater vent or an open doorway, you’re basically creating a dust storm. I learned this during a home workshop cleanup: I wiped, checked, and found new spots within minutes.
Fix: pick a calm space. Turn off fans. Close windows. If you must clean at home, do it in a room with still air and bright light.
Mistake #5: Using the wrong fluid (or too much fluid)
Household glass cleaner, alcohol, or random “screen cleaner” products can leave residues, attack coatings, or create streaks. Sensor cleaning fluid is made for this exact job.
Fix: only use sensor cleaning fluid from reputable camera brands. Use the swab-ready amount recommended in the instructions.
DIY vs pro sensor cleaning: when to call it in 2026
Here’s my opinion straight: if you’ve already caused smears, or if you keep finding new blobs after careful cleaning, it’s usually time to stop DIY. Trying again and again can turn a small job into an expensive one.
Use a pro if you see these red flags
- Oil or film spots: these look greasy and often spread into a bigger stain.
- Streaks after wet cleaning: if you have long lines instead of small dots, the swab or fluid may have left residue.
- Water marks: dried droplets act like glue.
- Repeated contamination: if you clean and then the sensor looks worse the next day, you likely have an airflow or lens-change issue.
Pro cleaning usually costs less than you think compared to the time you lose reshooting client work. In many cases (depending on the shop and your camera model), you’ll pay somewhere around the cost of a mid-level lens filter or a camera strap. The exact price changes by region, but the value is the risk reduction.
What a pro typically does (so you can judge the service)
Good shops often inspect with special sensor scopes. They can identify the spot pattern and choose the right method, sometimes using deeper cleaning steps or specialized solutions for sticky contamination.
Ask what tools they use and whether they offer a guarantee. A serious place can explain their process clearly, not just “we clean it.”
People Also Ask: quick answers to common sensor cleaning questions
Can I clean my camera sensor without removing the lens?
Usually, yes for safe prep steps. Your camera’s built-in sensor cleaning and air-blower use happen with the lens off, because the shutter needs to open and the sensor must be exposed. You can’t truly wet-clean without exposing the sensor, so be ready for that step.
If you’re trying to avoid removing the lens for dust reasons, you can still do the camera’s internal cleaning mode and take test photos first.
How often should I clean a camera sensor?
Most photographers don’t need frequent wet cleaning. For many people, once every few months is enough, or even only once a year.
In my experience, the trigger is lens changes. If you shoot events and swap lenses all day, plan for more dust. If you shoot one lens most days, you’ll go longer.
What does a sensor cleaning “spot map” tell me?
A spot map is the pattern of visible dust after you take a test shot. If the spots stay in the same spot across images, they’re on the sensor. If the spots move when you change the framing, they’re more likely on the lens or filter.
Many people try to fix the wrong thing because they don’t do this check.
Will sensor dust affect autofocus?
It can, but it’s not the usual cause. Most autofocus systems rely on dedicated sensors or points with their own optics, not the main image sensor surface. Dust mainly affects image quality—like spots in the photo—not whether autofocus works.
That said, if you’re dealing with oil or heavy debris, it’s still best to clean or get help.
Can I use a microscope to inspect my sensor?
You can, but don’t buy a random cheap scope and trust it blindly. If you want inspection, sensor scopes designed for cameras are more reliable. The bigger value is that you can see whether you have dust, streaks, or oily film.
For most readers, a few careful test shots are enough to decide whether DIY is safe.
Prevent dust in the first place: habits that save you from cleaning
The best camera sensor cleaning is no cleaning. You reduce dust buildup with a few small habits that take almost no time.
Build a “clean lens change” routine
- Pick a calm place to change lenses (indoors, away from wind).
- Keep the camera facing down when the lens is off.
- Don’t leave the body open any longer than needed.
- Use the body cap and rear lens cap whenever you’re between shots.
In dusty outdoor work, I also avoid “lens swapping on the move.” I stop, find a sheltered spot, do the change, then start shooting again.
Use the right storage and cleaning timing
Store cameras in a dry bag or dry cabinet if you live in a humid area. Humidity can help dust clump and makes oil marks more stubborn.
Also, if you get a lot of smears, check your lens and filters too. A dusty filter can mimic sensor dust in your test photos.
Watch out for causes beyond dust
Sometimes what looks like sensor dust is actually a coating issue, a manufacturing marker, or even a software correction artifact. If the “spots” appear only after you change camera settings, check your in-camera long exposure noise reduction and any dust-removal features.
Not every visible dot is dust, and it’s worth being sure before you start swabbing.
Tool list: what to buy (and what to skip)
If you’re starting from scratch, the tool list matters because the wrong items can turn a simple job into a scratch-fest.
| Tool | Why you need it | What to avoid |
|---|---|---|
| Camera blower bulb | Removes loose dust without touching | Propellant “canned air” |
| Sensor swabs (correct size) | Wipes safely in one controlled motion | Cotton buds, tissues, cloth scraps |
| Sensor cleaning fluid | Prevents streaking and residue | Household glass cleaner, random alcohol |
| Good light + sensor inspection (optional) | Helps you see what you fixed | Cheap scopes with unclear optics |
If you want a starting point, I usually recommend buying a sensor swab kit that matches your format and a small bottle of proper fluid. It’s cheaper than paying for professional fixes after a bad DIY attempt.
Internal links: related gear care and tech topics
Cleaning is only one part of keeping your setup reliable. If you’re thinking about sensor dust and “small problems that ruin shots,” you’ll probably like these related reads on our site:
- Sensor cleaning kits compared: what’s worth buying
- How to prevent lens and sensor dust during outdoor shoots
- Why small apertures show dust so clearly
- Backups for photographers in 2026 (so cleanup doesn’t cost you work)
Conclusion: keep it safe—clean only what needs cleaning
Camera sensor cleaning is one of those tasks where confidence matters more than speed. Use the camera’s built-in cleaning first, blow off loose dust with a proper blower, then wet-clean only when needed with the right swabs and sensor fluid.
Stop DIY immediately if you see smears, streaks, or signs of oil film. When the mess keeps coming back or looks sticky, a pro sensor cleaning is the smarter move. If you do it in this order, you’ll fix the problem more often and avoid the mistakes that turn a dust speck into a bigger headache.
Actionable takeaway: Do one test shot at f/11 to confirm sensor spots, then follow the safest step first. After you clean, take another test photo—don’t guess.