Here’s the surprise: most “prime vs zoom” debates ignore the one thing that decides your results—how fast you can frame and refocus while you’re walking. In real travel and street work, timing is everything. The lens with the right focal length for the scene matters more than the lens brand, and the wrong choice can cost you the photo you actually wanted.
My answer to “which produces better results?” is simple and not the same for everyone. If you want the best image quality and low-light performance for a specific look, a prime wins. If you want more keepers during busy trips because you can adjust framing quickly, a zoom wins. This Lens Comparison: Prime vs Zoom for Travel and Street Photography—Which Produces Better Results? guide breaks down when each one earns its place, with practical settings and real-world examples.
Quick answer: Prime for look and light, zoom for keepers on the move
If you’re choosing for travel and street, primes usually look better when the light is low and when you’re willing to move your feet for framing. Zooms usually give more “got it!” moments because you can go wide or tight without changing lenses.
Prime is an easy win if you shoot early mornings, night markets, or inside cafés. Zoom is an easy win if you’re roaming a city for hours, often without time to plan.
What “better results” really means in travel and street
Better results isn’t one number. It’s a mix of sharpness, focus accuracy, shutter speed you can keep, and how often you press the shutter at the right moment.
In street photography, you often have less than 1 second from “I see something” to “it’s gone.” In travel photography, you might get 5–10 seconds, but only if the subject is still. When you’re trying to catch people, bikes, street signs, or quick gestures, your lens choice changes how quickly you can frame.
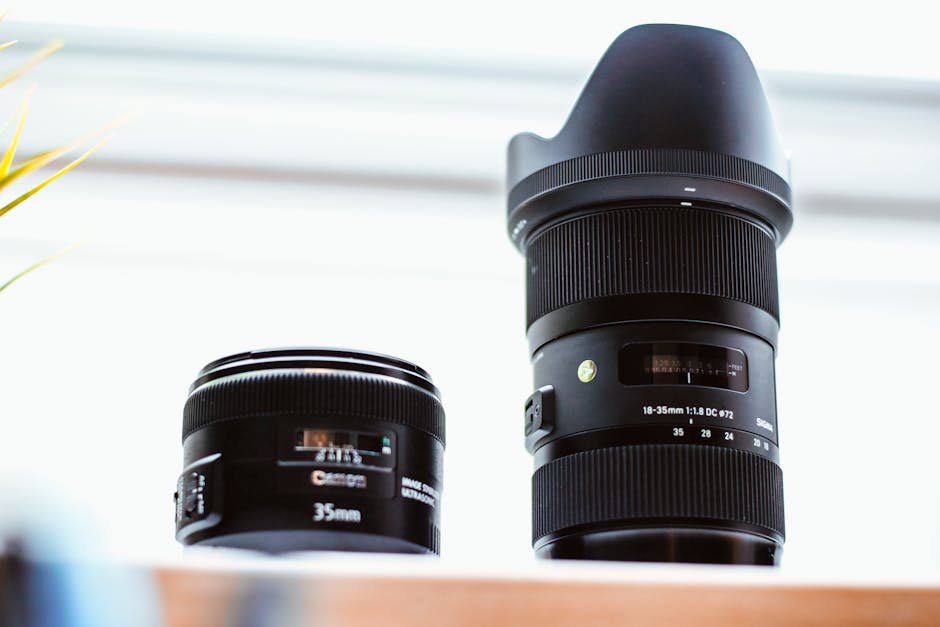
Definition check: A prime lens is a lens with one focal length (like 35mm or 50mm). A zoom lens changes focal length (like 24–70mm) without you swapping lenses.
Prime vs zoom: the real differences you’ll notice
Both lens types can take stunning photos. The differences show up in how they behave in the field.
1) Low light and depth of field: primes usually win
Primes often have larger apertures like f/1.8, f/1.4, or f/2.8. Aperture is how wide the lens opens to let in light. A wider aperture means faster shutter speeds and cleaner images at night.
Here’s what I see in practice: when I switch from a typical travel zoom (often f/2.8–f/5.6 depending on range) to a 35mm prime at f/1.8, I can usually drop my ISO by 800–1600 steps in the same scene while keeping the shutter speed up. That’s the difference between “grainy but usable” and “sharp enough to print.”
Depth of field is how much of the scene stays in focus. Primes let you blur backgrounds more easily, which helps subjects pop on busy streets.
2) Framing speed: zooms usually win while you walk
A zoom lens lets you go wide to capture the scene, then zoom in for the details. That means fewer interruptions. You don’t stop to swap lenses. You don’t miss the moment while your hands fumble in a bag.
On crowded days, I often use a compact zoom because people are close and I can’t always step forward. Tightening the zoom to 50–80mm equivalent (on APS-C) helps me make portraits without invading space.
Big point: zooms help you react. Street photography isn’t always planned. The best scene is the one you’re already in front of.
3) Autofocus and consistency: both can be great, but primes feel simpler
Modern primes and zooms both autofocus well. Still, I notice primes feel more “confident” when I’m tracking small subjects against busy backgrounds. It’s not magic. It’s usually because primes are often built with faster optics and simpler lens designs.
That said, a sharp zoom with good stabilization can beat a slow prime if your prime is too dim for the shutter speed you need.
4) Distortion and correction: zooms can be trickier, primes are often cleaner
Zoom lenses can show barrel distortion at wide angles and pincushion distortion at the long end. Cameras often auto-correct this in-camera or in raw software, especially as of 2026.
I still find primes make straight lines look natural faster with less editing. If you shoot architecture during travel, that “straight lines without work” feeling is real.
Street photography: when a prime beats a zoom
If you want a simple workflow and a specific look, a prime for street photography usually beats a zoom.
I’m talking about the kind of look where you can see the subject clearly even when the background is loud. A fast prime helps with that. It also forces you to slow down just enough to compose, which is a good thing in the street.
Prime focal lengths that work on real streets
These are the ones I see used again and again, because they “fit” human moments.
- 28–35mm (full-frame): great for street scenes, environmental portraits, and walking shots.
- 40–50mm: great for candid portraits and tighter moments without feeling too invasive.
- 50–85mm: great for details and compressed street storytelling.
If you’re on APS-C, multiply by about 1.5. So a 35mm full-frame look is about a 23mm on APS-C.
What most people get wrong with primes
The most common mistake is picking a prime focal length you don’t actually use. I’ve watched people bring a 50mm prime all day and then complain it feels too tight. But then they never try moving two steps left or right.
Primes teach you to “walk with the lens.” It’s not just about zooming with your feet. You need to change your shooting habits. If you’re the type who wants to shoot faraway moments without moving, a zoom will feel easier.
Street test you can do in 10 minutes
Try this the next time you go out. It’s quick and it tells you what your lens choice should be.
- Pick one spot with foot traffic.
- Set your camera to shutter priority or manual with auto ISO.
- Use a shutter speed target of 1/500s for moving people and 1/250s for slower scenes.
- Take 20 frames with a prime (like 35mm) at a wide aperture.
- Then take 20 frames with a zoom at a mid-range focal length.
- Pick your best 10 from each. Which set has more keepers without blur?
That’s your answer for how you shoot, not how a spec sheet predicts it.
Travel photography: when a zoom beats a prime
For travel, zooms often win because your day is packed. You go from landscapes to food to monuments to people to street details without warning.
One lens that can cover wide to mid-tele saves time and keeps you shooting instead of planning.
Zoom focal ranges that match travel habits
Here are the travel ranges I recommend based on what people actually photograph.
- 24–70mm (full-frame): classic “everything” range for cities, portraits, and day-to-day scenes.
- 24–105mm: adds more reach for details like signs, faces, and distant buildings.
- 18–55mm / 16–50mm on APS-C: light and compact for walking days.
- 70–200mm (if you already bring it): best when you’re staying put at viewpoints or events.
You don’t need every range. You need the range you’ll use without thinking.
Travel example: the “one lens” day
Last year (in 2026 travel planning season), I shot a full day in a historic district with just one zoom. I started wide for street context at 24–28mm, then zoomed in for a café doorway portrait at 50–70mm.
When the light got dim, I didn’t change lenses. I just adjusted my zoom, raised ISO, and kept the shutter fast enough. That kept my number of keepers high. The images weren’t always as clean as a prime would have been, but I had more good shots to choose from.
What people get wrong about zooms
People often assume a zoom will automatically look worse. Sometimes it does. But a good zoom with sharp optics and stabilization can produce results that are “good enough to love.”
The real risk is choosing a zoom with too-slow maximum aperture for night scenes. If your zoom max aperture drops to something like f/5.6 at the long end, you’ll fight shutter speed when light falls.
In night street work, slower zooms can lead to motion blur from your hands or from the subject. That’s why primes are so popular after dark.
Image quality and settings: how to choose based on light
Light is the deciding factor for most people. If your days are bright and you shoot mostly in daylight, zooms are easier. If you shoot mornings, nights, and indoors, primes make your life simpler.
A simple “light check” rule I use
Before you leave your hotel, do a quick check. Stand near a window or under a street light. If your camera struggles to keep shutter speeds around 1/250s handheld for moving subjects, you’re going into prime territory.
Here are practical starting points that work well for street and travel (and they don’t require fancy gear):
- Bright daylight: shutter 1/500–1/1000s, auto ISO on, aperture priority or manual with auto ISO.
- Cloudy / shade: shutter 1/250–1/500s, consider f/2.8 if you have a zoom or prime.
- Night / indoor: shutter 1/125–1/250s for slower walking, 1/250–1/500s for people moving; use your widest aperture and accept ISO in exchange for sharpness.
Note: stabilization helps your blur from hand shake, but it doesn’t stop subject motion. For moving people, you still need enough shutter speed.
Stabilization and autofocus: don’t compare specs without context
Stabilization is often marketed like it “fixes blur.” It helps with camera shake, especially at slower shutter speeds. It doesn’t freeze a moving subject.
For travel and street, this matters because people move, cars pass, and gestures happen fast.
How to decide if you need stabilization
If you shoot handheld often, stabilization is a big deal. In 2026, many lenses and bodies include strong in-body or optical stabilization, but the key is how you use it.
- If you shoot mostly in daylight: stabilization is a nice-to-have.
- If you shoot in dim restaurants: stabilization helps less than a fast aperture.
- If you shoot landscapes from a tripod: stabilization doesn’t matter much.
My own take: for street work, stabilization is helpful for static scenes and slow movement. For fast moving crowds at night, a prime’s f/1.8 is still the bigger advantage.
A real comparison table: Prime vs Zoom for travel and street results
This table is the fastest way to decide what fits your style and how you’ll get better photos.
| Category | Prime lens results | Zoom lens results |
|---|---|---|
| Low-light sharpness | Usually stronger due to wider max aperture (often f/1.4–f/2.0) | Often weaker if max aperture is slow (f/4–f/5.6 at long end) |
| Framing on the move | You must move your feet or reposition | You reframe instantly without walking |
| Background blur (“subject pop”) | More dramatic blur at same distance | Can blur too, but often less at wider apertures |
| Consistency for straight lines | Often cleaner for architecture | May need correction for distortion |
| Weight and travel comfort | Often lighter per focal length, but you may need more than one prime | Can be heavier, but replaces multiple lenses |
| Keeper rate during busy days | High if your focal length fits your subjects | High because you adapt quickly |
My approach in 2026: a two-lens combo beats “either/or”
If you want better results without overthinking, I recommend building a small set instead of picking a side.
Here’s the combo logic I use on trips: one lens for “low light and character,” and one lens for “everything else.” That way, when the day changes, you’re ready.
Combo option A: 35mm prime + 24–70mm zoom
Use the 35mm prime when light drops or when you want cleaner portraits and street moments. Use the zoom when you’re walking and don’t want to stop to change positions.
Bring the 35mm as your “night insurance.” Bring the zoom as your “keepers on busy streets” tool.
Combo option B: 50mm prime + 24–105mm zoom
If you shoot more details and less wide city context, a 50mm prime is a strong choice. Pair it with a longer travel zoom like 24–105mm so you still capture wider scenes when needed.
This combo works especially well for people who like candid portraits and street fashion.
When the “one lens only” plan makes sense
Bring one zoom if you’re traveling light, you hate swapping lenses, or you want maximum shooting time. If your zoom is fast at least at the wide end (for example f/2.8 constant), you can still do great at dusk.
But if your zoom is slow at the long end, expect more blur at night unless you’re okay with higher ISO.
People Also Ask: Prime vs zoom for street and travel
Is a prime lens better than a zoom for street photography?
For most people who shoot at dawn, dusk, or night, yes—primes are often better for sharpness and blur. A 35mm or 50mm prime with a wide aperture makes it easier to keep shutter speed high when the street gets dark.
For daytime street scenes with lots of changing angles, zooms can be better because they increase your keeper rate. If you’re getting more good frames with a zoom, that’s “better results” for you.
Do zoom lenses have worse image quality than primes?
Not always. Image quality depends on the lens design, the specific model, and the focal length you use. Some zooms are extremely sharp in the center and can look excellent after correction.
Primes usually have an edge in low light and background blur because their apertures are wider. That’s the main quality difference most photographers feel.
What focal length is best for street photography when using a zoom?
Most people end up liking the mid-range. A “normal” zoom setting around 35–50mm equivalent (full-frame) is a safe starting point.
If your zoom covers longer ranges, use 70–100mm equivalent for candid portraits from a distance. Use the wide end (24–28mm) only when you’re sure you want a big scene feel.
Should I buy a prime or zoom first?
Buy based on your next trip and your current limits, not on what sounds cool.
- If you often shoot indoors or at night, start with a fast prime like a 35mm f/1.8 or 50mm f/1.8.
- If you shoot mostly during the day and you want flexibility, start with a standard zoom like 24–70mm or 24–105mm.
- If you’re unsure, start with the zoom first because it covers more situations and teaches you what you actually like.
Then add the prime later once you know your favorite focal length for your own style.
Action plan: choose your lens based on a trip budget and shooting style
If you want an easy way to decide, use this checklist.
Step 1: Pick your likely shooting conditions
- Mostly sunny streets and landmarks? Zoom first.
- Night markets, cafés, museums, or stage lighting? Prime first.
- Mixed days (most trips)? Consider a two-lens kit.
Step 2: Choose your “walk-around” focal length
Ask yourself what you photograph most.
- People and nearby scenes: 35mm prime or mid-range zoom (around 35–50mm).
- Details and tight moments: 50mm prime or longer end of your zoom.
- Wide city storytelling: use the wide end of a standard zoom.
Step 3: Lock a shutter speed target
Before you leave, set a target so you don’t blame the lens when it’s actually motion blur. For handheld street work, I aim for:
- 1/250s as a baseline for moving people.
- 1/500s when people are quick or you’re zoomed in.
If your camera can’t hit that target with the aperture you have, that’s your signal. Add a faster prime or accept that the results will be softer.
Where cybersecurity matters for photographers (quick but important)
Gear choice affects your photos. Security affects whether you still have them later. If you travel and shoot a lot in 2026, you’re also moving files across cards, laptops, and cloud accounts.
If you want to protect your images after the shoot, read our guide on cybersecurity for photographers and safe photo workflows. It’s the kind of practical step that saves years of edits.
Don’t forget the tech side: workflow and lens choice go together
Even with a perfect lens, you can lose quality with bad habits. One common issue is rushing off after a trip with an unorganized card workflow. Another issue is forgetting lens corrections in your editor.
If you want more help on keeping your photos organized and sharp, check our RAW editing workflow tips for better street and travel images. It pairs well with lens testing.
Bottom line: the better lens is the one that matches your speed and your light
Here’s my final take, clearly:
- Prime lenses produce better results when light is low, when you want a strong background blur, and when you’re willing to move your feet for framing.
- Zoom lenses produce better results when you’re trying to capture more moments quickly, when your subjects change fast, and when you need one-lens flexibility on travel days.
Your “better results” doesn’t come from arguing specs. It comes from matching the lens to your real shooting rhythm. If you want the easiest upgrade path, build a two-lens setup: one fast prime for night and character, and one zoom for daytime keepers.
If you only buy one lens, choose it based on where you miss shots today. Not what you wish you were shooting.
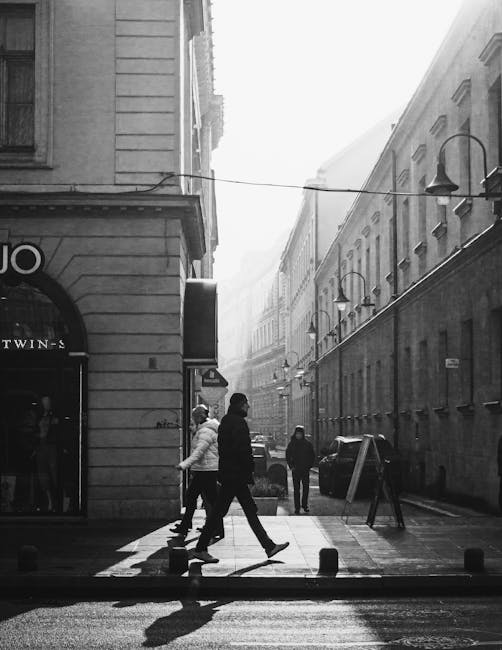
Featured image alt text: Lens Comparison prime vs zoom for travel and street photography shown on a city street at dusk