One of the fastest ways to lose thousands of photos isn’t a camera failure. It’s a rented venue Wi‑Fi, a stolen laptop, or one bad click that turns your files into ransom notes. In 2026, ransomware gangs still target photographers because photo collections are valuable, timelines are tight, and many backups are set up the “easy way” that ransomware can reach.
Here’s the direct answer: build a secure photo workflow by encrypting every drive that touches your originals, using backups with versioning and isolation (so malware can’t reach them), and tightening the steps that stop common ransomware tricks.
I’ve set up workflows for my own shoots and for friends who do paid jobs on tight schedules. The biggest lesson: security isn’t one tool. It’s a chain of small choices that make it hard for attackers to win.
Start With the Threat Model: What Ransomware Actually Does to Photo Files
Ransomware is not magic. It’s usually a mix of file scrambling and account takeover, done fast to scare you into paying. The typical play is: get access, encrypt your local files, then scan for more copies on other drives and shared computers.
In photography terms, that often means your SD card or camera-to-laptop transfers are “in the blast zone.” If your backup drive is always plugged in, ransomware often hits it too. If your cloud sync keeps running, it may upload encrypted versions or lock you out.
Here’s the plain-English definition that matters: encryption is scrambling files so only you (with the right key) can read them. versioning means keeping older copies so you can roll back after damage.
Encrypt Your Working Drives (and Do It the Right Way)
Encrypting your drives is the fastest way to reduce damage from theft, lost laptops, and casual snooping. It also buys time if something nasty gets onto your machine.
There are two common paths: full-disk encryption on your computer, and encryption on external drives where you keep edits or exports. If you only encrypt external drives, your laptop can still become a problem. If you only encrypt the laptop, your workflow can still leak via portable disks.
Encrypt the computer that imports photos (Windows, macOS, Linux)
This step protects you when a device is stolen or when you’re working at a café and someone finds your device.
- Windows: Turn on BitLocker. For most photographers, the “start simple” approach is: enable BitLocker for the system drive and require a strong password plus a recovery key you store offline. In 2026, device encryption is standard in many Windows setups.
- macOS: Turn on FileVault. It encrypts the system drive and helps prevent easy recovery of your photos if the laptop is taken.
- Linux: Use LUKS (Linux Unified Key Setup) for disk encryption. It’s the common, proven route.
What most people get wrong: they turn on encryption but don’t save the recovery key safely. Without that key, you’re the one locked out. I keep mine printed and stored in a small envelope in my “backup cabinet,” not in a cloud photo folder that ransomware could destroy.
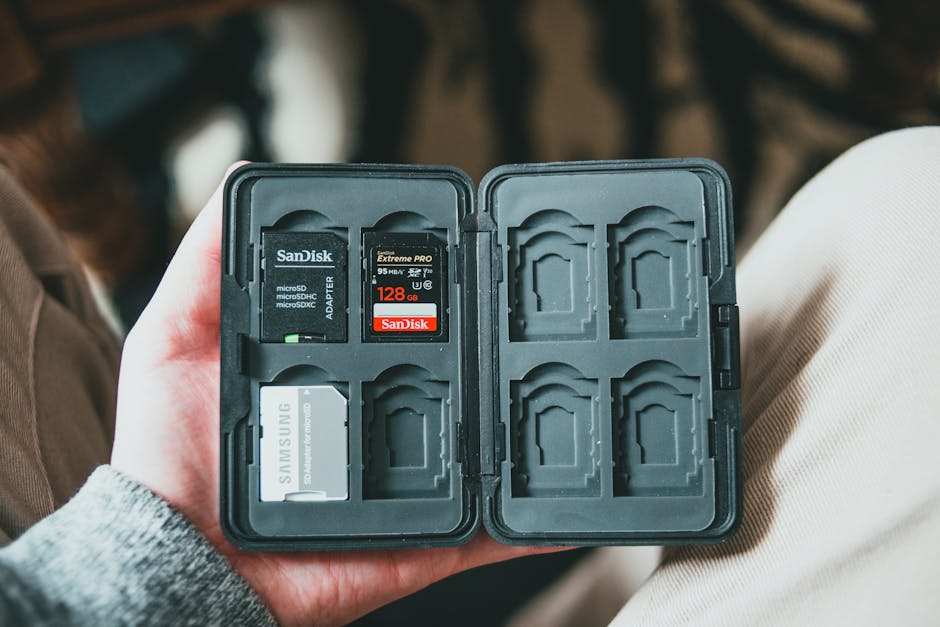
Encrypt external backup drives with encryption-by-default tools
For external drives, I prefer encryption that’s easy to verify. Two popular options are:
- VeraCrypt (cross-platform): You can create an encrypted container or encrypt the whole drive. It’s strong and widely used.
- Apple / Windows built-ins: If you’re on macOS or Windows, you can also use built-in encryption formats for external drives, but you still need to think about portability and what devices you’ll connect the drive to.
My personal preference for photo work: encrypt the whole external drive, not just a folder. Ransomware often tries to access files broadly. Whole-drive encryption reduces what it can grab.
If you shoot tethered (camera connected to a laptop), remember: your laptop becomes the main storage. Encrypting the working drive is non-negotiable in that setup.
Build a Backup System That Ransomware Can’t Reach

Backups should be boring. They should also be hard to touch by malware. A secure backup has two jobs: it must store clean copies, and it must resist “same day” damage.
There’s a common rule in security: the backup must not be the same target. If your backup is always mounted, ransomware often reaches it. If your backup depends on the same login token that the attacker steals, ransomware can sometimes write through it too.
Use the 3-2-1 idea, then add “versioning and isolation”
The 3-2-1 rule is a good starting point:
- Keep 3 copies of your photos
- Store them on 2 different types of media (for example, SSD/HDD and external HDD)
- Keep 1 copy off-site
For photographers, I add two extra lines that matter:
- Versioning: Keep older versions so encrypted changes don’t overwrite the past.
- Isolation: Don’t keep the “last clean copy” plugged in all the time.
Practical backup setup I recommend for photographers (no fluff)
Here’s a workflow I’ve used with minor tweaks for friends doing weddings, headshots, and studio events. It’s meant for real life, not a lab.
- Import + verify: Copy from SD card to a fast working drive. Do a checksum verify if your tools support it (I’ll mention tools below). Then don’t keep writing to the same card.
- First backup (local, fast): Mirror the working folder to a second internal or fast external drive. This is your “speed” copy.
- Second backup (archive, offline): Every day or every shoot day, plug in a dedicated external drive and run a full backup job. Then unplug it.
- Off-site backup: Use a cloud backup that supports version history. Don’t rely only on one cloud app.
- Test restore monthly: Pick one folder and try restoring it. If you can’t restore, it’s not a backup—it’s a wish.
Yes, you have to do the restore test. I’ve seen people lose months of “backup” time because the tool finished with errors they never noticed.
Encrypted backups: what to do with cloud and sync tools
Cloud tools can be tricky. Some sync apps treat encrypted files like normal files and upload them. If ransomware hits your folder first, you may end up uploading the damage.
My hard rule: cloud backups should use versioning and should ideally be configured so they don’t overwrite older versions. If your cloud provider has a “revert” or “restore previous versions” feature, turn it on.
For extra safety, consider encrypting the files before they go to cloud. That way, even if something changes locally, the attacker still can’t read your originals from the cloud. Full pre-encryption also helps if your cloud account gets compromised.
Lock Down the Import Stage: Where Most Photographers Lose the Battle
Your import stage is where you can stop ransomware early, because you’re in control of which files get copied and where they go. If you make the import stage strict, the rest of the workflow gets easier.
Use a “read-only” thinking mindset during import
When I import, I treat the SD card like it’s infected until proven safe. That means: copy first, verify, then format. I don’t run random scripts or open unknown files right from the card.
Also, don’t connect unknown drives to your photo laptop. I know it’s tempting—“it’s just a USB stick.” That’s how malware spreads.
Verify integrity with checksums (and pick the right time to do it)
Checksums are a way to confirm the copied file matches the original byte-for-byte. It’s not about security alone; it prevents corrupted copies too.
Tools I’ve seen work well in real photo workflows include:
- ExifTool / hashing tools with scripts for advanced users
- Photo management/import apps that offer verify on import
- Checksum options in some backup software
If that sounds heavy, keep it simple: verify once right after copying. You don’t need to verify every edit export if your editing happens on verified sources.
Automate without opening the door to malware
Some photographers use auto-import tools. That can be great, but it also means automated tasks run the moment the drive appears.
My rule: don’t use auto-run scripts that open files from new drives. Turn off Windows AutoRun. On macOS, be careful with permissions for newly connected devices.
If you want automation, use tools that copy and verify first, without launching unknown programs.
Stop Ransomware With the Everyday Security Habits That Actually Work
Ransomware prevention is mostly about reducing “entry points.” If attackers can’t log in or execute code easily, they don’t get to encrypt your photos.
Use strong accounts and separate your photo life from your admin life
One mistake I see a lot: the same account is used for everyday browsing and for admin actions. If an email attachment triggers malware, the attacker often gets admin rights too.
In 2026 best practice is:
- Use a standard user account for daily work.
- Only switch to admin when you must install software.
- Turn on multi-factor authentication (MFA) for email and cloud storage.
If you’re using a password manager, set it up now. It’s not just a convenience thing; it reduces weak reused passwords.
Patch fast: your camera app isn’t the only risk
Attackers go after the machine, not the camera. That means browser updates, OS updates, and app updates matter more than people think.
Set a schedule you can follow: check updates weekly, and install security updates as soon as they’re available. When I do client work days, I block “update windows” on days I can’t afford downtime.
Turn on real-time protection and control what runs
Make sure you have active anti-malware protection and that it scans removable drives. Windows Security and similar tools can do this.
Also, control what can run. On Windows, you can use built-in protections that warn you when unknown apps try to execute. On macOS, keep Gatekeeper on and don’t install random “codec packs” from sketchy sites—those are a common entry point.
People Also Ask: Secure Photo Workflow Questions
What’s the best encryption method for photographers?
The best method is the one you’ll actually use without locking yourself out. For most photographers, full-disk encryption (BitLocker on Windows or FileVault on macOS) plus encrypted external drives (VeraCrypt or full-drive encryption) is the most practical combo.
If you’re frequently moving drives between computers, whole-drive encryption works better than a folder inside an unencrypted container.
Should I keep my backup drive plugged in all the time?
No. For ransomware risk, always-plugged backups are a weak spot. Keep your “archive” backup drive unplugged most of the time, and plug it in only to run backups. If you need constant access, use extra protections like strict permissions, versioning, and malware-resistant backup features.
Think of it like this: if a burglar gets into your office, you don’t want the safe on the same desk.
How do I know my backups are ransomware-safe?
Test restore and test isolation. Restore one folder from the archive backup monthly. Also check that your backup system keeps older versions and that your offline drive isn’t writable when it’s disconnected.
If your “backup app” can delete files from the backup when you delete them locally, you need versioning or immutability settings.
Can I recover photos if ransomware encrypts them?
Yes, if you have clean backups and you can restore them without reintroducing the infected files. The key is to stop the spread first: disconnect affected drives, check what’s changed, then restore from a known clean copy.
If you don’t have backups with versioning, recovery can be difficult because the encrypted files may be unreadable without the attackers’ key.
Tooling You Can Use in a Real Photo Workflow (With Tradeoffs)
You don’t need a bunker of software. But you do need a few tools that cover encryption, backups, and cleanup.
| Need | Common Options | Pros | Watch-outs |
|---|---|---|---|
| Full-disk encryption | BitLocker (Windows), FileVault (macOS), LUKS (Linux) | Strong protection on the device itself | Recovery keys must be stored safely |
| Encrypted external drives | VeraCrypt, whole-drive encryption | Protects portable media | Forget the key and you lose access |
| Backups with versioning | Backup software + cloud with history | Roll back after damage | Some sync tools overwrite older files |
| Import verification | Checksum tools / import apps with verify | Prevents silent copy errors | Extra time on large shoots |
If you want gear-focused tech articles too, my site also covers ways to keep storage fast during shoots—like choosing the right cards and drives. For related reading, check how to choose storage for photography workflows.
A Real-World Example: Wedding Weekend Cleanup After a Near Miss
This happened to a friend of mine in 2026. They brought two external drives to a venue, kept one always plugged into the laptop, and used a cloud sync folder for “client gallery previews.” The email was fake. The attachment didn’t just try to run—it tried to spread.
They caught it before encryption finished. But the damage was already visible: a “preview” folder in sync got messed up, and the always-plugged external drive had a few new weird files.
What saved them wasn’t luck. It was this plan:
- The originals were on a drive with full encryption.
- They had an unplugged archive drive with version history.
- They had a habit of restoring one job folder to confirm backups worked.
When we rebuilt the folder, we restored from the archive copy and stopped syncing until the machine was cleaned. That order matters. If you clean the laptop first but then sync infected folders, the cloud can get hit again.
Make It Stick: A Simple Secure Workflow Checklist
If you can’t follow it on a busy shoot day, it won’t help. This checklist is short enough to keep near your gear bag.
Before a shoot
- Confirm laptop encryption is on.
- Confirm you know where your recovery key is stored offline.
- Have one “archive” backup drive ready (unplugged).
- Make sure cloud backup version history is enabled.
During import
- Copy photos from card to the working drive.
- Verify integrity once after copy.
- Do not open random files from the card.
- Safely eject and format the card only after you’ve confirmed the copy.
After the shoot
- Run a local backup to a second drive.
- Plug in the archive drive, run backup, then unplug.
- Wait for cloud backup versioning to catch up.
- Clean up preview folders so they don’t become the “main” storage by accident.
Every month
- Restore one folder from each backup source.
- Check free space on backup drives so you don’t find out too late that backups stopped.
Where This Advice Doesn’t Fit (Quick Limitations)
If you run a public kiosk system, share one machine with many users, or rely on someone else’s unmanaged NAS, your options change. In those cases, you need admin cooperation and tighter network controls.
Also, if you’re using a workflow that requires always-on drives for client access, you can’t fully “unplug” the risk. Then you rely even more on versioning, account control, and least-privilege permissions.
Conclusion: Secure Your Photo Workflow Like You Secure Your Client Delivery
If there’s one takeaway, it’s this: secure photo work is built around reducing one bad moment. Encrypt your working devices, keep archive backups isolated, and make sure backups keep older versions so ransomware can’t lock you out forever.
Do the boring setup this week: enable disk encryption, set up versioned backups, and do one restore test. Once you’ve proven your workflow works, you can worry less when life gets hectic—because you’ll already be ready for the day something goes wrong.
For more practical cybersecurity tips aimed at camera-to-computer workflows, you may also like secure camera-to-computer transfer steps and how to stop phishing attacks as a photographer.
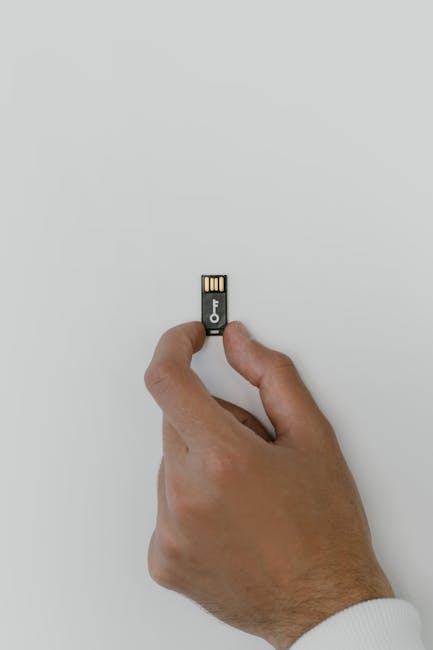
Featured image alt text: Secure photo workflow with encrypted drive and ransomware-safe backup routine (2026)