Top 10 Accessories Photographers Actually Use isn’t a gimmick list—it’s the stuff I keep reaching for on real assignments because it fixes real problems: camera shake, ugly shadows, unusable audio, unreliable power, and messy workflows. If you’ve ever come home with sharp photos but unusable video (or great video but no usable sound), you already know why accessories matter.
Here’s my practical, field-tested lineup for 2026: tripods, lighting, audio, and the “boring” essentials that save your shoot. I’ll share what to buy, what to avoid, and how to pack it so you’re not hauling twice the gear you need.
Quick answer: the most-used accessory categories (and why they win)
The most-used accessory categories are the ones that protect image quality and production continuity. A stable tripod reduces blur, lighting shapes your subject, and good audio prevents the “great visuals, unusable story” problem—especially for interviews and documentary-style shoots.
Most photographers don’t fail because they chose the wrong camera sensor. They fail because they didn’t add the accessories that remove variables: stability, illumination, sound capture, power reliability, and safe storage. That’s also why these “Top 10 Accessories Photographers Actually Use” show up across genres—weddings, events, portraits, sports, and travel.
1) Tripods photographers actually use: the stability workhorse
A tripod is the single accessory that most directly prevents wasted shots. Motion blur from a handshake can sneak in at shutter speeds you “feel” are fast enough, especially when you’re shooting telephoto, doing long exposures, or stacking.
In my kit, I treat tripod choice as three jobs: (1) support the camera, (2) control composition precisely, and (3) adapt to terrain—stairs, rocks, sand, snow, and uneven sidewalks. For 2026, a strong default is a carbon-fiber travel tripod if you walk a lot, paired with a ball head that lets you lock fast.
Tripod setup that actually matters on location
Most people set up too tall, then fight shake with technique. My rule: keep the center column down whenever possible and spread the legs fully. If you’re shooting at eye level, you’ll gain steadiness and reduce vibration.
- Use the smallest practical extension (center column down).
- Hang a weight from the hook when wind exists (bag, not your camera).
- Turn off VR/IBIS if your tripod system is stable and your camera recommends it (I follow the camera menu guidance).
- Switch to a 2-second timer or use a remote for mirrorless to eliminate start-up jolt.
What most people get wrong about tripods
They obsess over maximum height and ignore transport length. If your tripod is too long for your bag, you’ll leave it behind—which means you never get the stability you bought for.
Also, don’t assume “stability” equals “heavy.” I’ve used compact carbon tripods that hold a mirrorless body plus a 70–200mm lens at stable shutter speeds just fine. The real benchmark is how it behaves under load and whether the head locks without creeping.
2) Heads and quick-release plates: the difference between ‘set up’ and ‘shoot’
The fastest tripod workflow is mostly about the tripod head and quick-release system. If you swap cameras or lenses mid-session, a solid Arca-Swiss compatible plate or comparable quick release can save minutes that you’ll otherwise lose to fiddly clamps.
My experience: the moment you miss a photo because you were “almost ready” is the moment you start caring about head ergonomics. A good handle position, smooth pan/tilt locks, and a release that doesn’t accidentally drop are quality-of-life upgrades that show up constantly.
Choosing tripod heads by shooting style
Ball heads are great for fast composition and general use. For architecture, landscapes, or long-horizon timelapses, a geared head can feel smoother for micro-adjustments. If you shoot video handheld-to-tripod transitions often, you’ll want a head that balances well and avoids sudden creep.
3) Lighting accessories: diffusers, modifiers, and smart placement
Good lighting accessories don’t just brighten your scene—they shape it. A tiny change in modifier choice can turn harsh specular highlights into soft, flattering tones.
When I’m building lighting for portraits or talking-head interviews, I think in three layers: source (flash or LED), modifier (softbox, umbrella, diffusion), and distance (how far from subject). If you only buy one lighting accessory, buy the diffuser you actually use in your space.
Fast modifier guide: what to pack for common shoots
- Small softbox (or diffusion dome): consistent face light for indoor portraits and events.
- White reflector: cheap fill for outdoor sessions at golden hour.
- Black flag or negative fill: controlled contrast for sculpting faces.
- Grid attachment: helps keep light off backgrounds in busy environments.
Lighting placement tip I use every time
Start by aiming the key light slightly above eye level and angling it down. Then, decide how much fill you want based on the story: high-contrast dramatic looks need less fill; “clean and friendly” portraits need more.
For interviews, I often use a soft key plus a practical background light. It’s a subtle trick: the background light gives depth without blowing out details, and the subject stays flattering.
4) LED panels and compact continuous lights for 2026 workflows
As of 2026, continuous lighting accessories are more practical than ever because accurate color and battery systems are easier to manage. LED panels are especially useful for hybrid creators who shoot stills plus short video clips.
My practical approach: pick a continuous light with predictable output (and real-time brightness control), then use it with a simple modifier. If you’re doing run-and-gun content, you want a light that can be set up in under 2 minutes and still look consistent frame-to-frame.
What to check before you buy a continuous light
- Color accuracy: look for stable color temperature and documented specs.
- Battery runtime: real runtime matters more than peak power.
- Dimmer smoothness: stepped dimming can ruin video matching.
- Mounting options: standard 1/4-20 and cold-shoe compatibility.
5) Audio accessories: the fastest way to upgrade your video quality
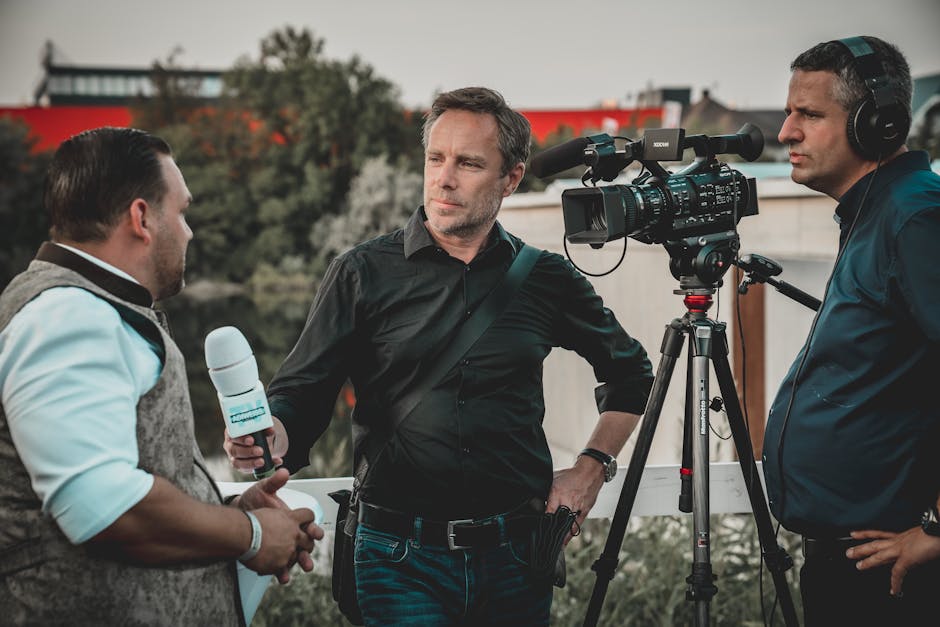
Audio is the upgrade most people ignore until it’s too late. Viewers forgive soft focus far more than they forgive unclear dialogue.
For interviews and event footage, I rely on two concepts: directional capture and clean monitoring. Directional microphones reduce background noise, while real-time monitoring helps you catch audio problems before you pack up.
Shot-specific audio choices (no guesswork)
- Interviews: use a lavalier mic for the subject plus a backup mic when possible.
- Vlogging / solo shoots: a small shotgun mic paired with a sturdy mount improves consistency.
- Outdoor dialogue: consider a wind solution (foam + windscreen) before you change anything else.
- Events: monitor your levels and avoid clipping—clipped audio is unrecoverable.
What most photographers get wrong about audio
They assume “the camera’s mic” is fine. It isn’t. Even in quiet rooms, camera mics capture fan noise and handling sounds, and they don’t reliably preserve speech intelligibility.
Another common mistake: setting levels by silence. I set levels while the subject actually speaks, because speech dynamics are where clipping starts.
6) Field audio essentials: headphones, shock mounts, and power
Headphones are non-negotiable for audio work. In production, I treat monitoring like exposure: it’s a real-time check that prevents the expensive mistake of fixing everything later.
Then add the mechanics. A decent shock mount reduces handling noise, and a power strategy keeps your audio gear from dying at the worst time. For traveling shoots, I plan battery swaps in advance and keep spare power accessible, not buried in the bottom of a bag.
Practical audio workflow I use on location
- Plug in the mic and headphones before rolling.
- Have the subject speak at natural volume.
- Confirm levels on every take if conditions change (crowds, fans, vehicles).
- Record a 5-second “voice check” clip for later syncing.
7) Power and storage accessories: the “don’t ruin the day” kit
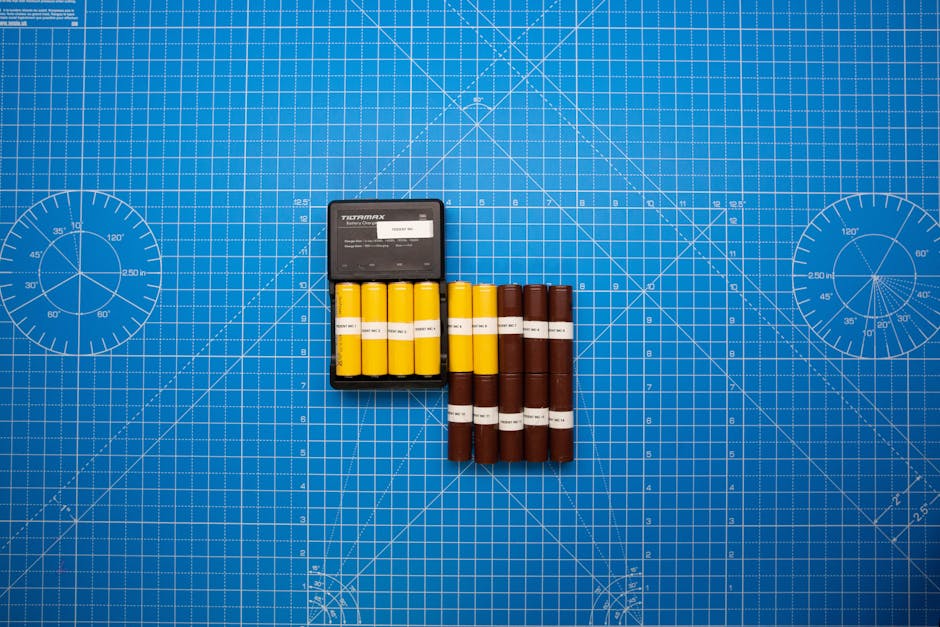
Power and storage are boring until they fail. Then they become the only story you’ll have when you get back to your computer.
For photography and hybrid work, I recommend three layers: reliable batteries, a fast charger strategy, and dependable storage. In 2026, the goal is to avoid two extremes—overpaying for overpriced storage and gambling on “cheap enough” power systems.
My power setup for multi-hour shoots
- At least 2–3 fully charged camera batteries depending on your shooting style.
- A compact dual-bay charger you can power in-field (car/portable pack).
- USB-C power compatibility for devices that support it (lights, audio recorders, monitors).
Storage strategy: what I do to protect client work
I follow a simple principle: never trust a single drive. On location, I offload to a primary storage device, then create a verification copy. When I’m working with clients, I keep the backup separate and labeled immediately.
If you want an extra layer of safety, your cybersecurity plan matters too. For practical guidance, see Cybersecurity for Photographers: How to Protect Client Images and Backups.
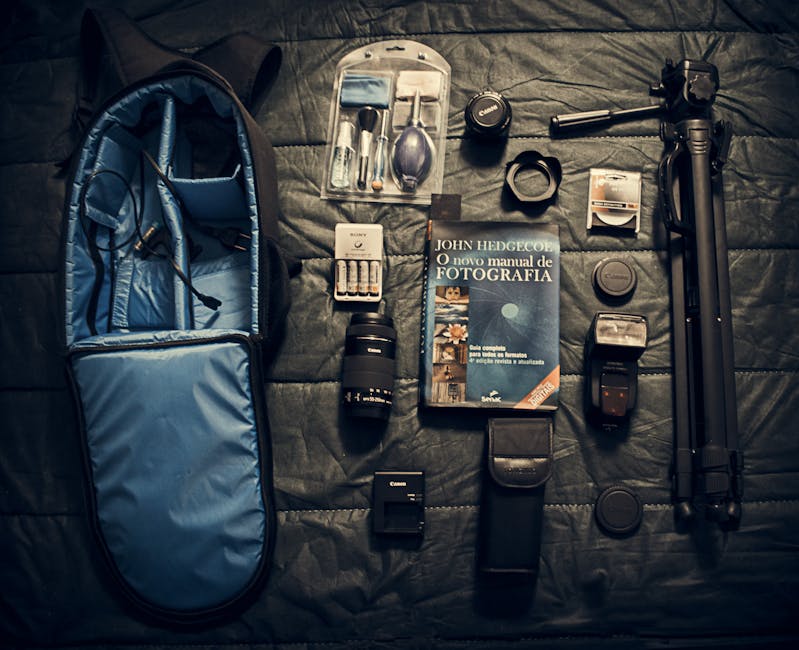
8) Backpacks, cases, and cable management you’ll actually use
Good camera bags aren’t about aesthetics—they’re about speed and protection. I’ve missed shots because a bag didn’t open smoothly, straps tangled, or cables needed “digging” to reach.
In 2026, I prefer modular organization: compartments for small gear, a padded sleeve for laptops or tablets, and a way to hold batteries and chargers without rummaging.
Field cable management: the small habit that saves hours
Use reusable Velcro straps, label both ends of key cables, and keep a “must-haves” pocket for adapters you use daily. When you’re traveling, labeling isn’t optional—it prevents the “why doesn’t this work” moment right before a client arrives.
9) Filters and lens accessories for consistent creative results
Filters are one of the most misunderstood categories. People buy fancy filters, then never keep them clean or they mount them incorrectly and see haze or vignetting.
I treat filters as creative tools with clear jobs: reducing glare, controlling highlights, or enabling long exposures. The key is choosing what matches your most common shooting situations.
My practical filter picks by use case
- Polarizer: outdoor glare reduction and more saturated skies.
- ND filters: motion blur in daylight for waterfalls, street scenes, and video.
- Clear protective filter: not for “optical magic,” but for front-lens protection when working in dusty environments.
Important: If you notice flare or haze, stop blaming the camera. Check filter cleanliness, alignment, and whether the filter glass matches your lens size and threading.
10) Tripods + lighting + audio: a real kit example for a hybrid assignment
The best way to understand “Top 10 Accessories Photographers Actually Use” is to see them in a real scenario. Here’s a hybrid portrait + short interview example from my 2026 workflow.
Case study: 90-minute studio portrait + 3-minute interview
- Stability: lightweight tripod with quick-release plate for product-style b-roll.
- Lighting: compact continuous LED with a small soft modifier for consistent eye highlights.
- Audio: lavalier mic + headphones for monitoring dialogue clarity.
- Power: charged camera batteries plus a spare battery for the continuous light.
- Storage: on-the-go offload with a second verification step before deleting originals.
- Workflow: labeled cables and a bag layout designed for quick “swap and shoot” changes.
The insight: the accessories that save your shoot aren’t always the most expensive. They’re the ones that reduce setup time, increase reliability, and protect your deliverables under real constraints.
People also ask: quick answers photographers want before they buy
These are the questions I see constantly from photographers comparing gear lists, especially when they’re upgrading for 2026 shoots.
What accessories do photographers actually use every day?
Most photographers use a stable tripod (even a compact one), a practical light modifier (reflector or diffuser), and audio monitoring if they shoot video. Add in a power plan and storage safety, and you get accessories that earn their keep daily.
Daily-use accessories are the ones that remove friction. If it’s annoying to set up, it won’t get used—even if it’s “high-end.”
Are tripods worth it for everyday photography?
Yes, if you shoot low light, long exposures, architecture, or telephoto compositions. A tripod also helps with framing precision—especially when you want to replicate a composition across multiple shots.
If you only shoot bright daytime handheld, a tripod still helps, but the return is smaller. In that case, a lightweight travel tripod or monopod might be a better match.
What’s the best lighting accessory for beginners?
The best beginner lighting accessory is the one that makes light softer and easier to control. A small diffuser/softbox and a reflector deliver a noticeable improvement quickly.
What beginners get wrong is buying too many modifiers at once. Start with one reliable softening tool, learn the distance and angle rules, then expand.
Do photographers need audio accessories?
If you shoot video (even occasionally), audio accessories are absolutely worth it. Good audio instantly upgrades perceived production value and reduces post-edit time.
If you’re strictly photographing and never record video, then audio gear isn’t necessary. But most creators end up recording something—behind-the-scenes clips, client testimonials, or event moments.
How do you choose field essentials without overspending?
Choose based on your failure points. If you’ve ever gotten home with blurry images, prioritize stability. If clients ask for “clear voices,” prioritize audio monitoring. If you’ve ever run out of battery mid-session, prioritize power.
Then build a minimal set. For example, you might start with one tripod, one reflector/diffusion tool, one audio monitoring solution, and a verified storage/offload plan.
Comparison table: what each accessory solves
| Accessory | Primary problem it solves | Best for | Common mistake |
|---|---|---|---|
| Tripod | Camera shake and blur | Low light, landscapes, telephoto | Extending the center column too high |
| Quick-release + head | Slow setup and missed transitions | Hybrid shooting, frequent swaps | Incompatible plate systems |
| Diffuser/soft modifier | Harsh highlights and unflattering contrast | Portraits, interviews | Using it too far from subject |
| Continuous LED | Consistent hybrid video/stills lighting | Run-and-gun content | Ignoring dimming smoothness |
| Directional mic + wind protection | Unclear dialogue and noise | Interviews, events | Relying on built-in camera audio |
| Headphones | Audio monitoring and level control | Any video capture | Setting levels in silence |
| Power + chargers | Dead gear at the wrong time | Multi-hour shoots | Storing batteries uncharged |
| Storage + backups | Data loss risk | Client deliverables | Deleting originals too early |
| Filters | Glare, motion, and creative control | Outdoor and long-exposure work | Ignoring filter cleanliness |
| Bag organization | Slow transitions and tangles | Travel and event workflows | Overpacking gear you don’t use |
Actionable takeaway: build a ‘reliability-first’ gear list
If you only remember one thing, make it this: the most useful accessories photographers actually use are the ones that prevent failure modes. Start with stability (tripod), shape your light (diffusion/modifier), protect your story (audio + monitoring), and secure your workflow (power + storage + backups).
For your next upgrade, pick one category where you’ve personally lost time or quality. Then invest in the smallest accessory set that fixes that specific problem. That’s how you end up with gear you’ll keep reaching for—not a closet full of “maybe someday” purchases.
And if you’re also thinking about protecting client assets once you’re back home, pair this gear strategy with your digital safety routine—check out Cybersecurity for Photographers: How to Protect Client Images and Backups and keep your files safe alongside your equipment.
If you want more gear decisions that connect directly to workflow, you’ll likely also like Gear Reviews on your site, where we focus on real-world use rather than spec sheet hype.